

User Guide
How to use IZY Social
Step-by-step guides for every page of the panel: from connecting accounts to scheduling posts, from the calendar to reports.
Account requirements
| Platform | Account needed | Status |
|---|---|---|
| A professional account (Business or Creator). | Connects with a professional account | |
| A Facebook Page you're an admin of. | Connects with a Page | |
| TikTok | A personal or business account. | Ready to connect |
| YouTube | A YouTube channel on your Google account. | Ready to connect |
| A personal profile or a company page. For a page, you must be one of its admins. | Ready to connect | |
| A business account (free; switch a personal account in settings). | Connects with a business account | |
| Threads | A Threads profile opened with your Instagram account. Personal accounts work too. | Ready to connect |
| X | A personal or business account. | Ready to connect |
Business panel
If you manage your own brand's accounts.
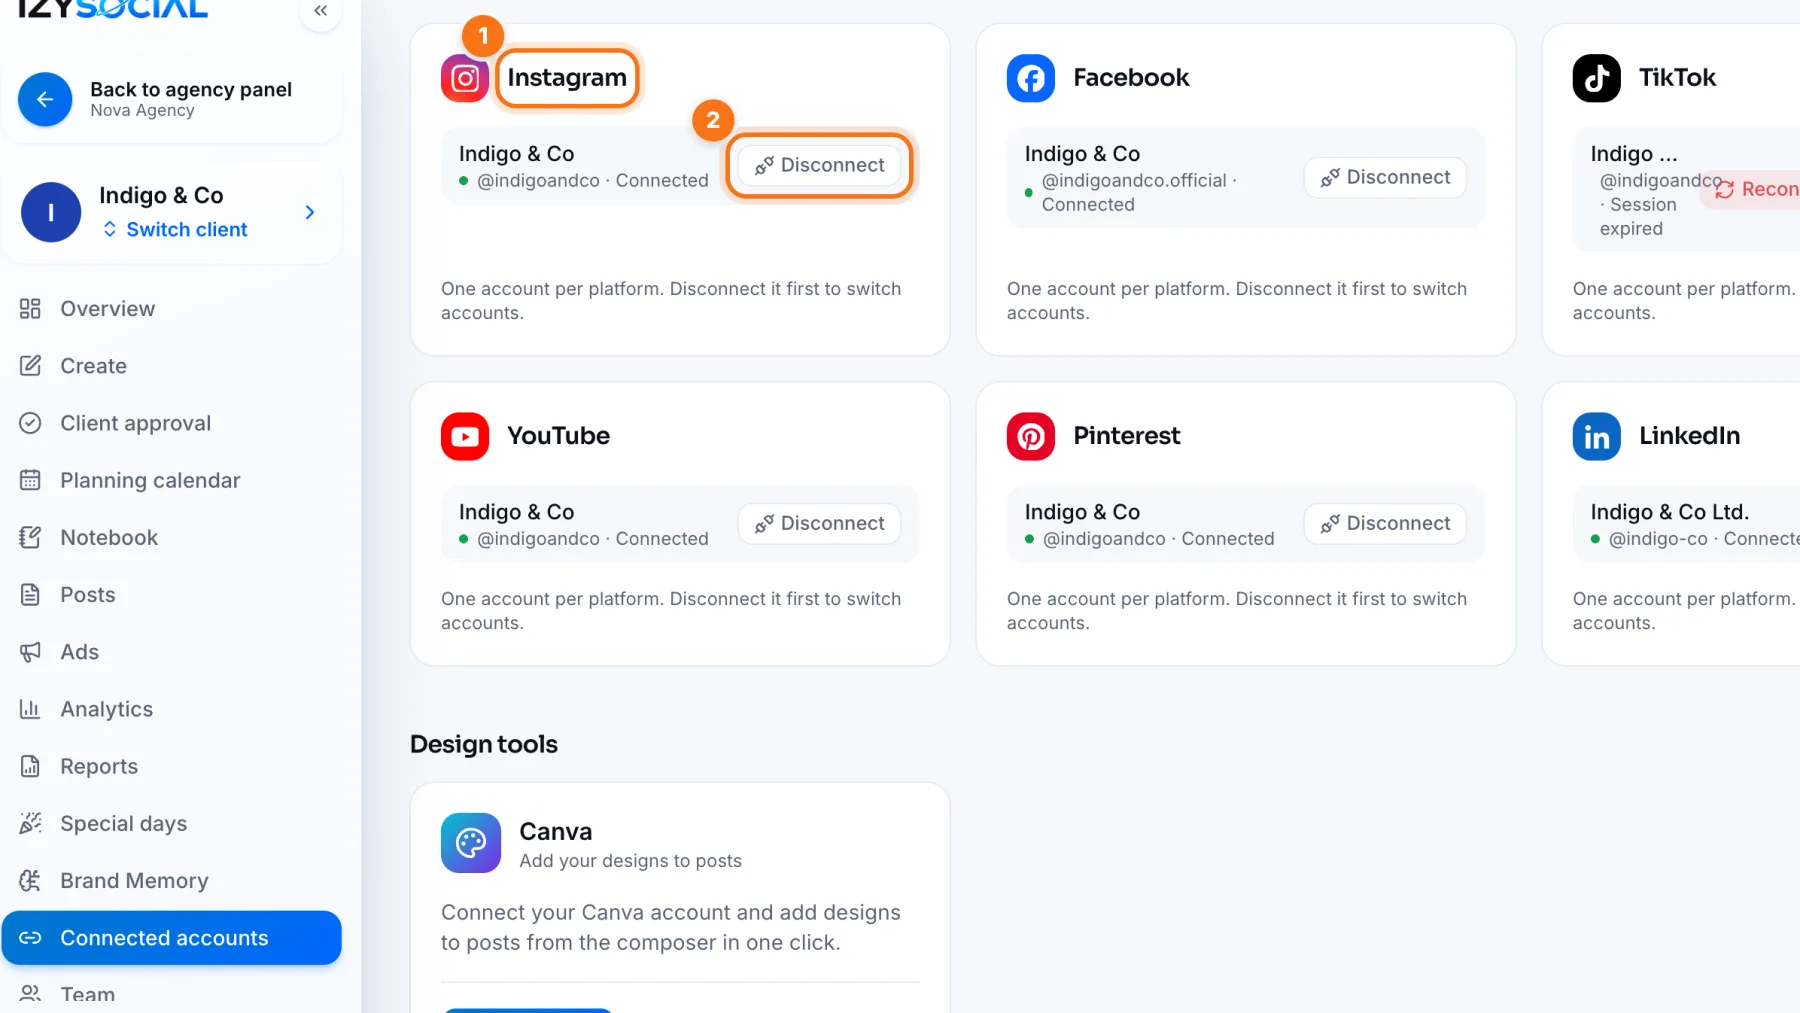 Getting Started: Creating an Account and Connecting Social AccountsSigning up and connecting accounts in IZY Social: the professional account and Facebook Page requirement for Instagram, Facebook Pages, YouTube channels and LinkedIn.Step 1
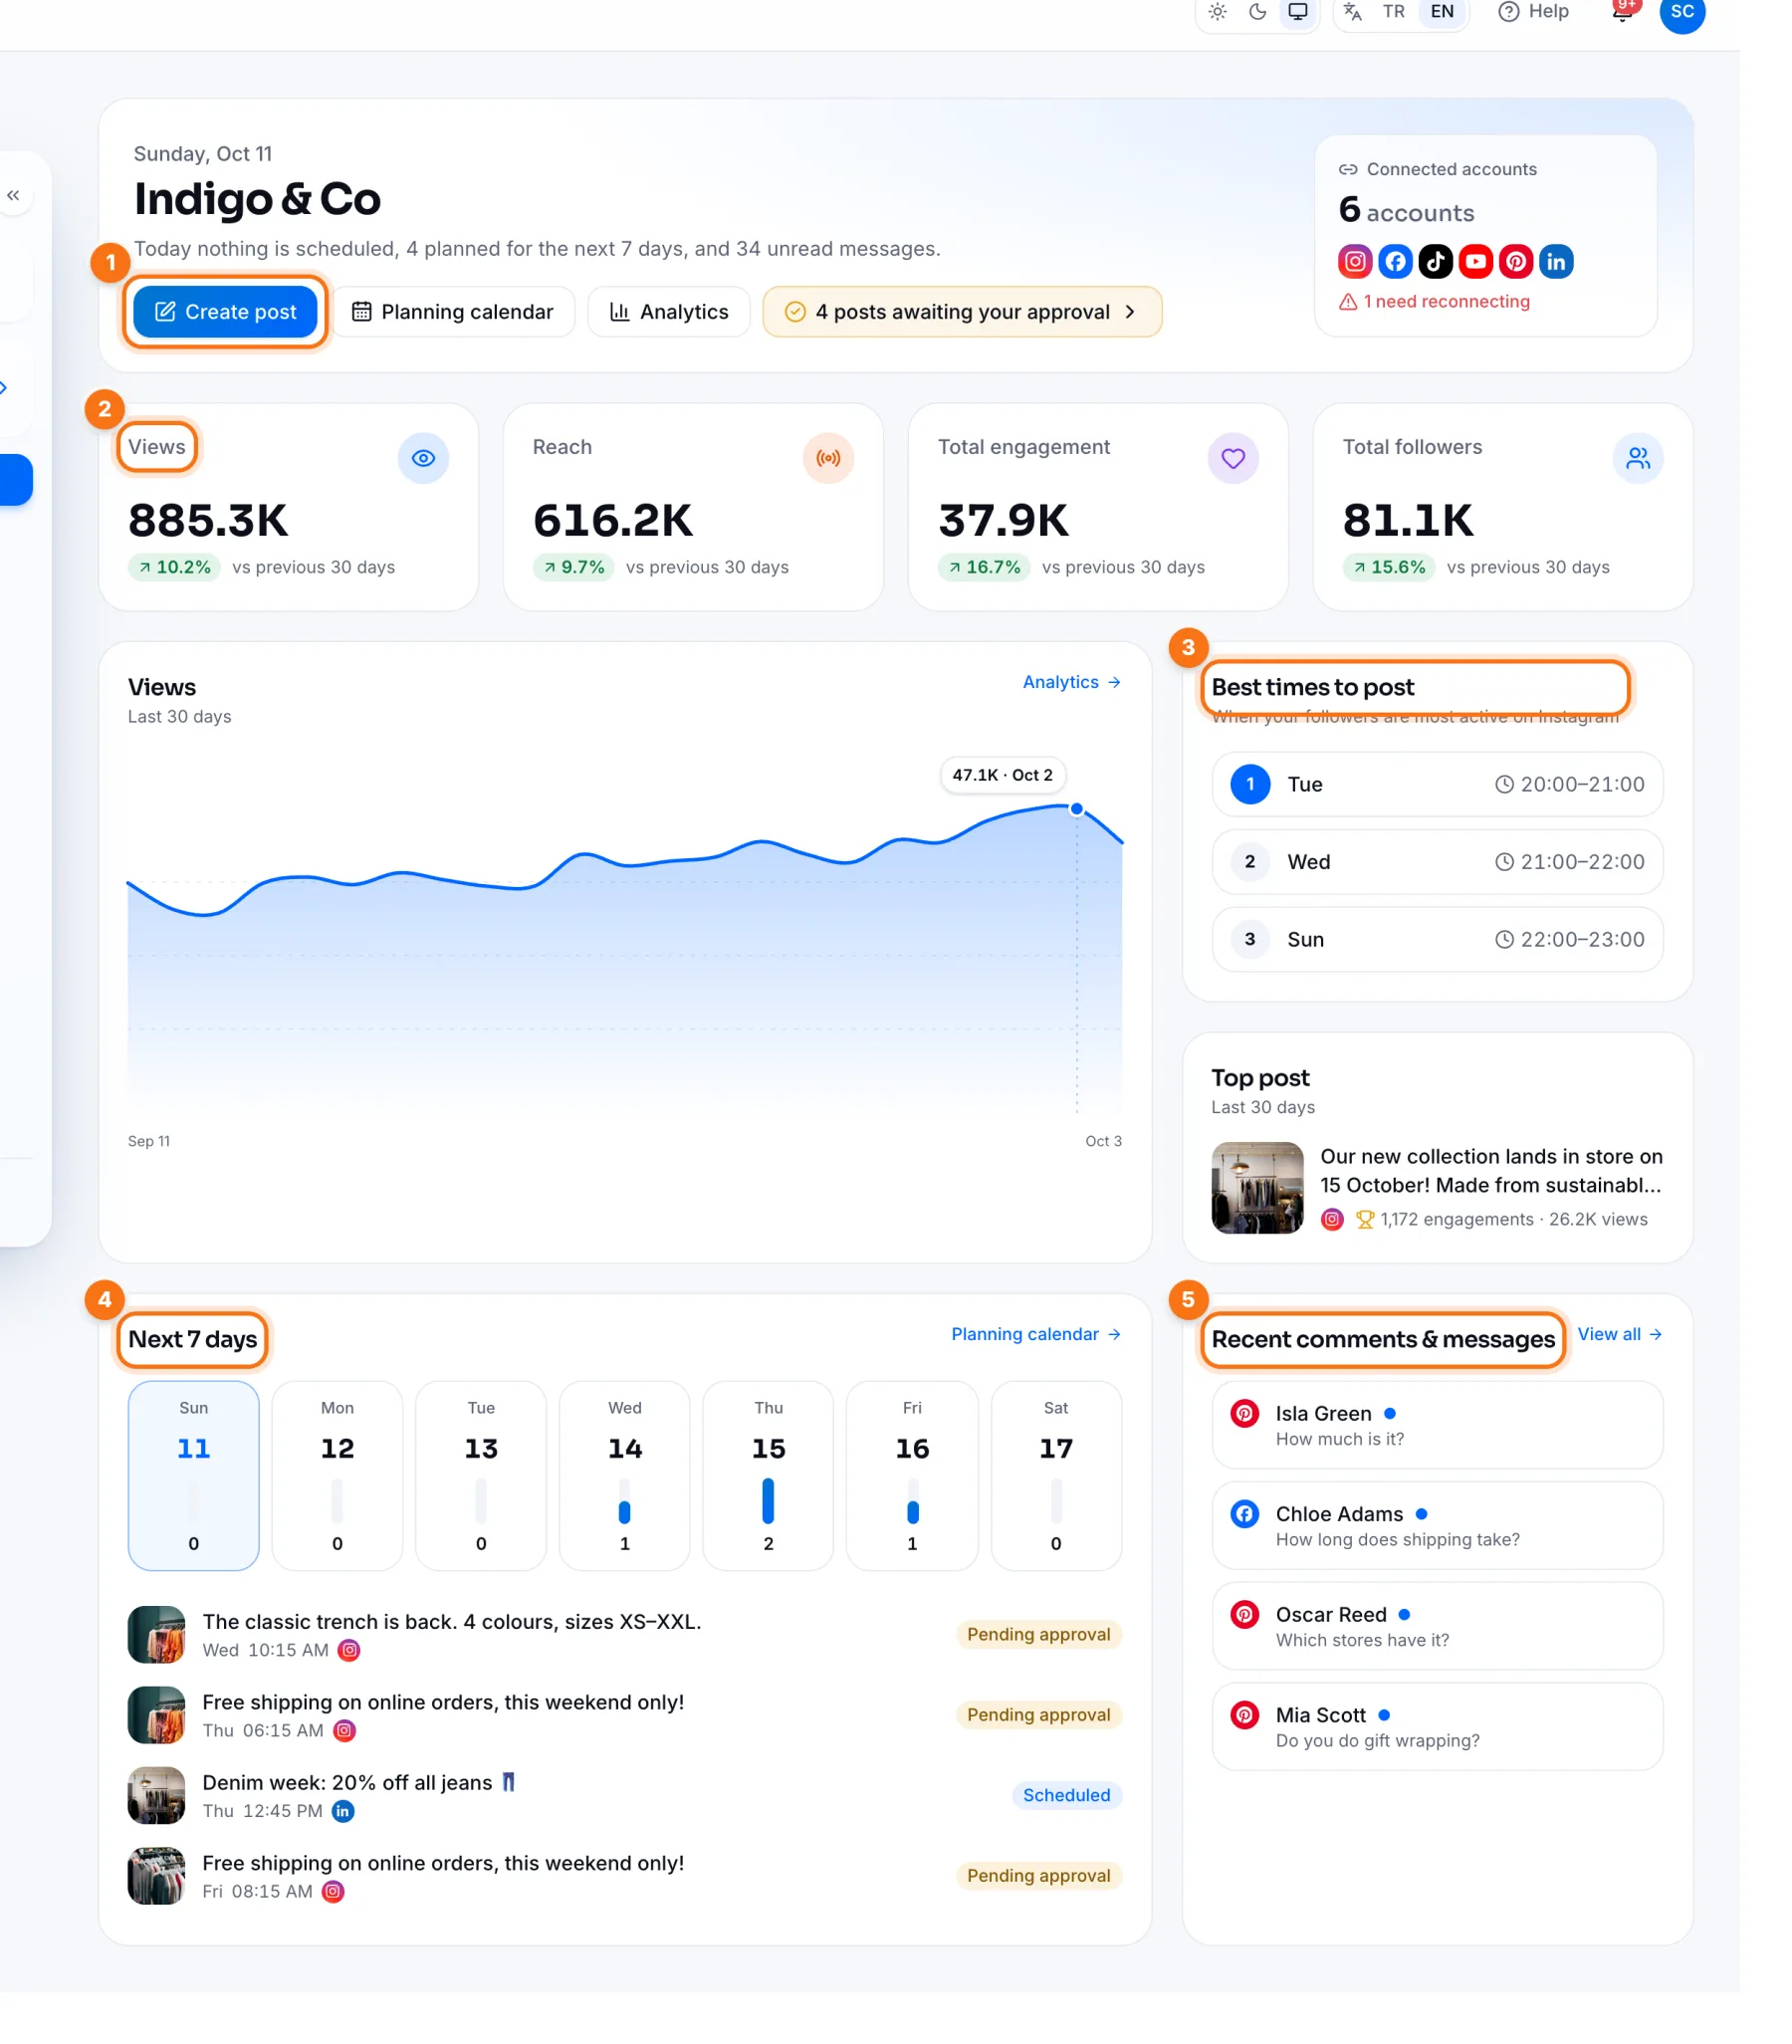 Dashboard: Your Social Media at a GlanceHow to read the IZY Social dashboard: today's status, the last 30 days, best times to post, the next 7 days and recent messages.Step 2
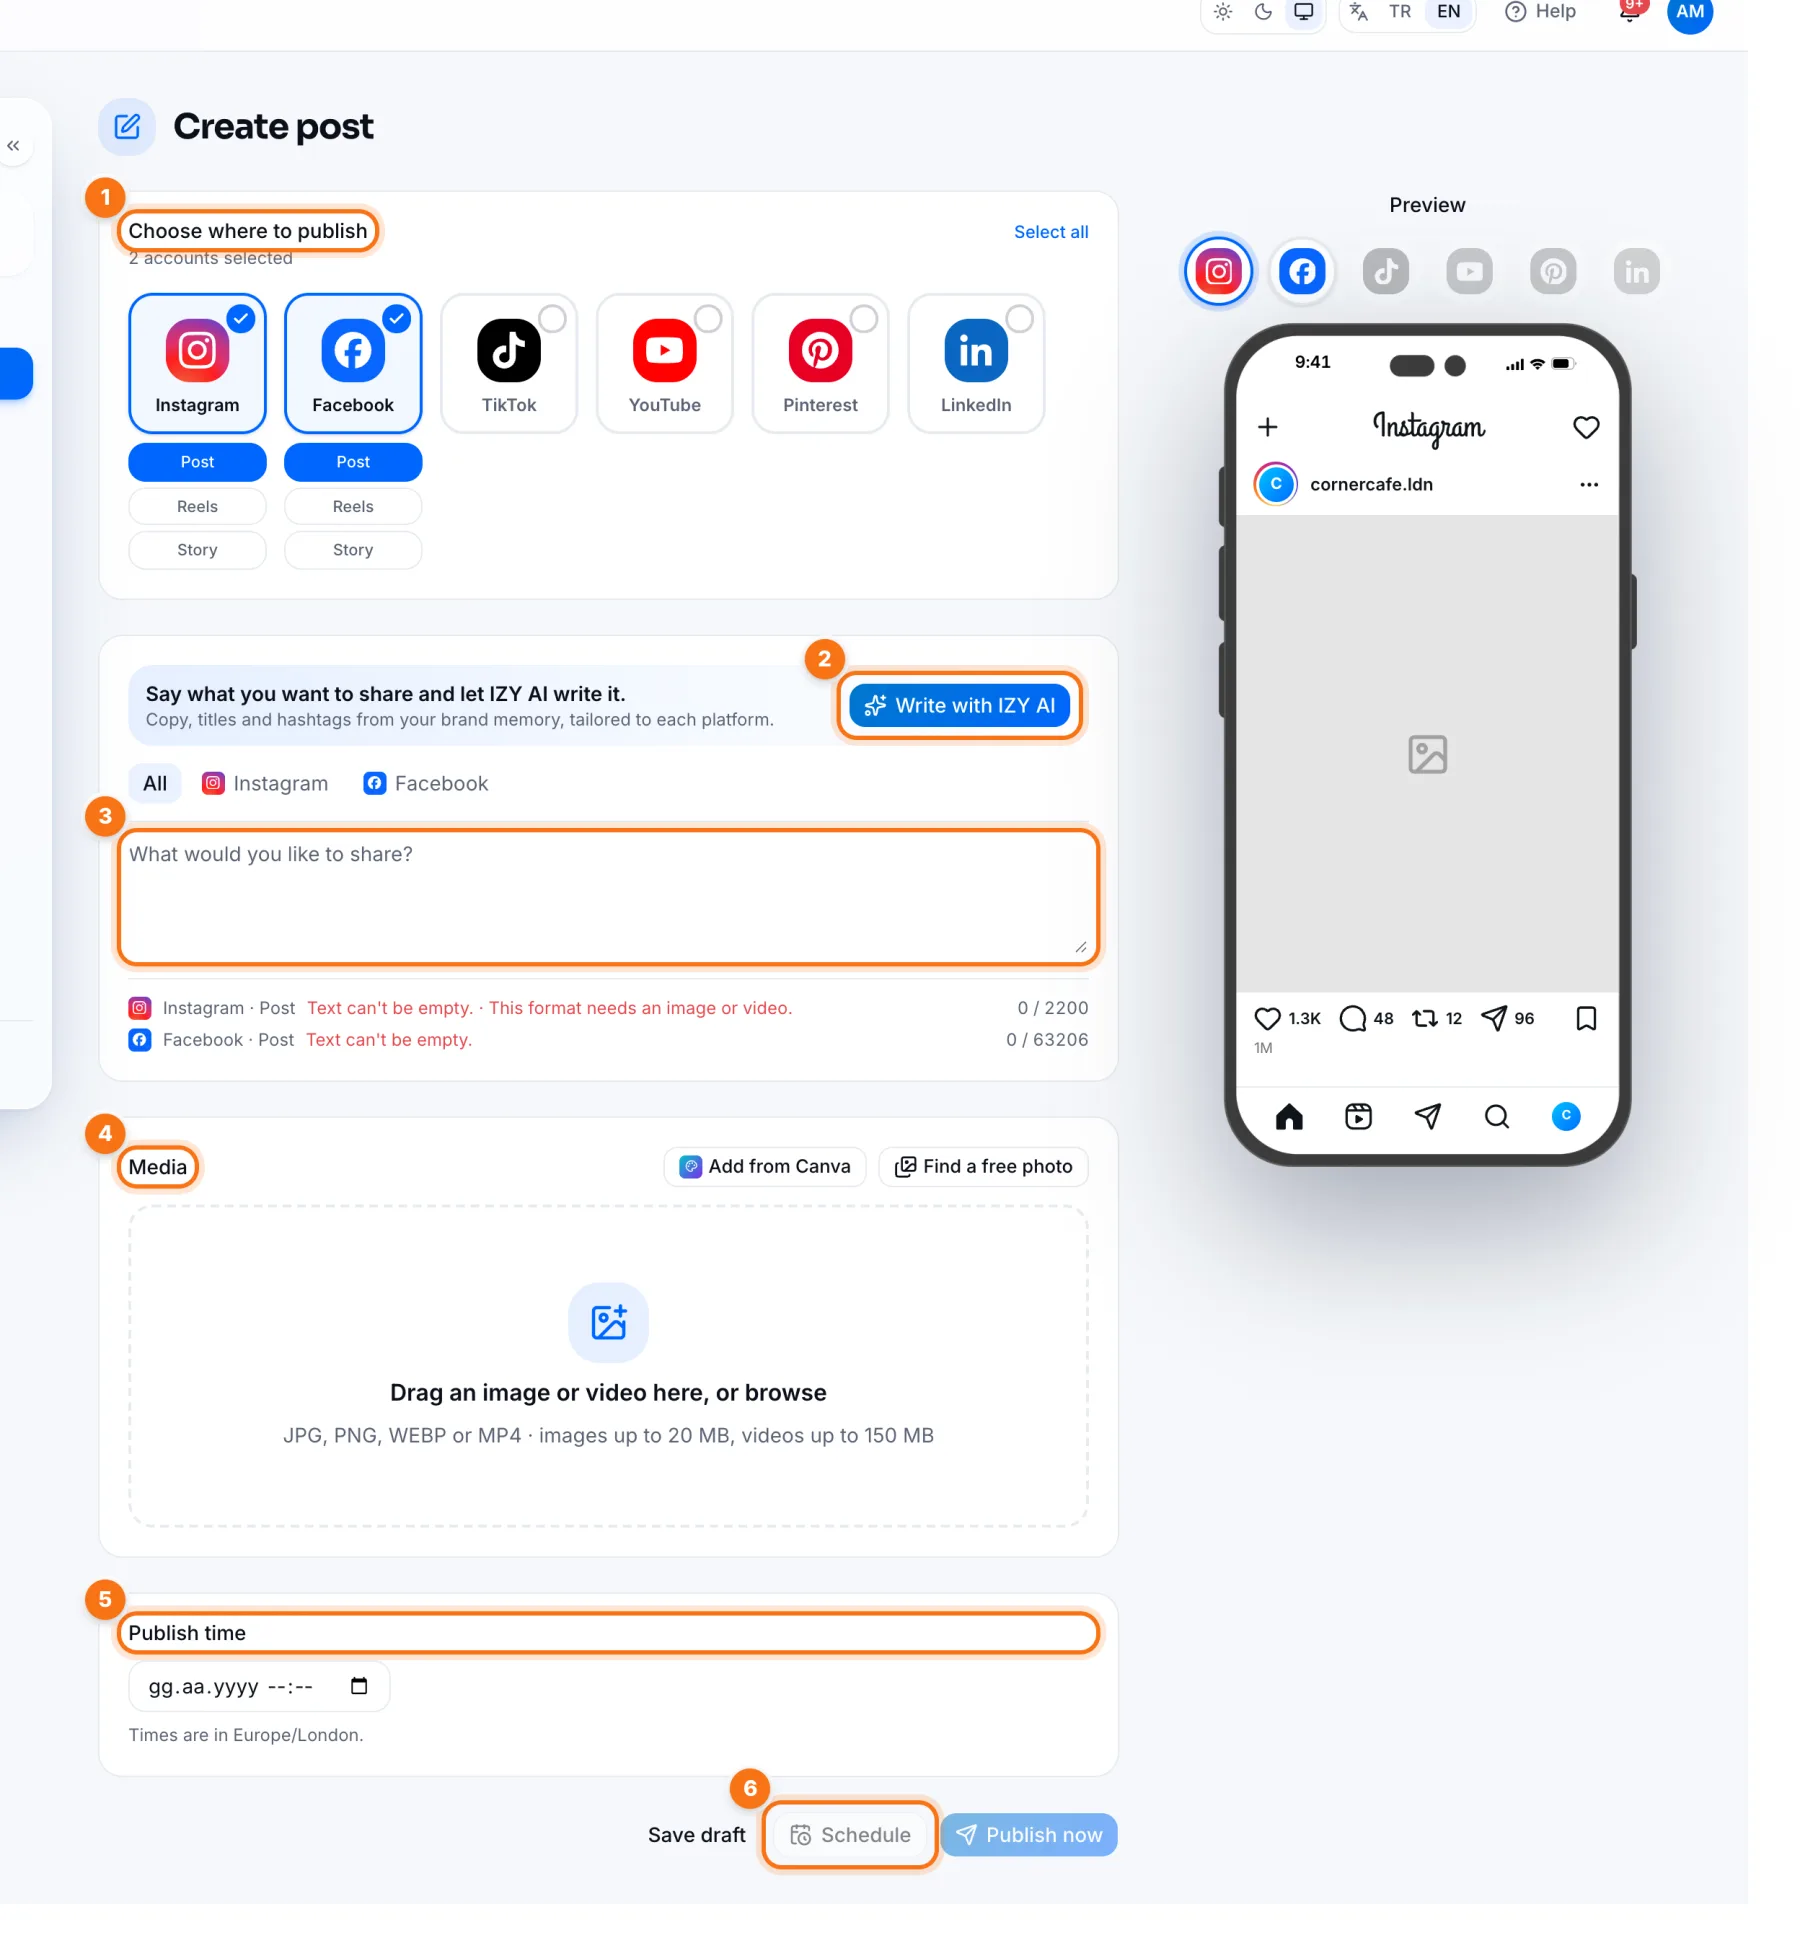 Creating a Post: Write, Add Media, Pick a Cover and SchedulePreparing a post end to end in IZY Social: choosing accounts, writing with IZY AI, Canva and images, cropping, video covers and scheduling.Step 3
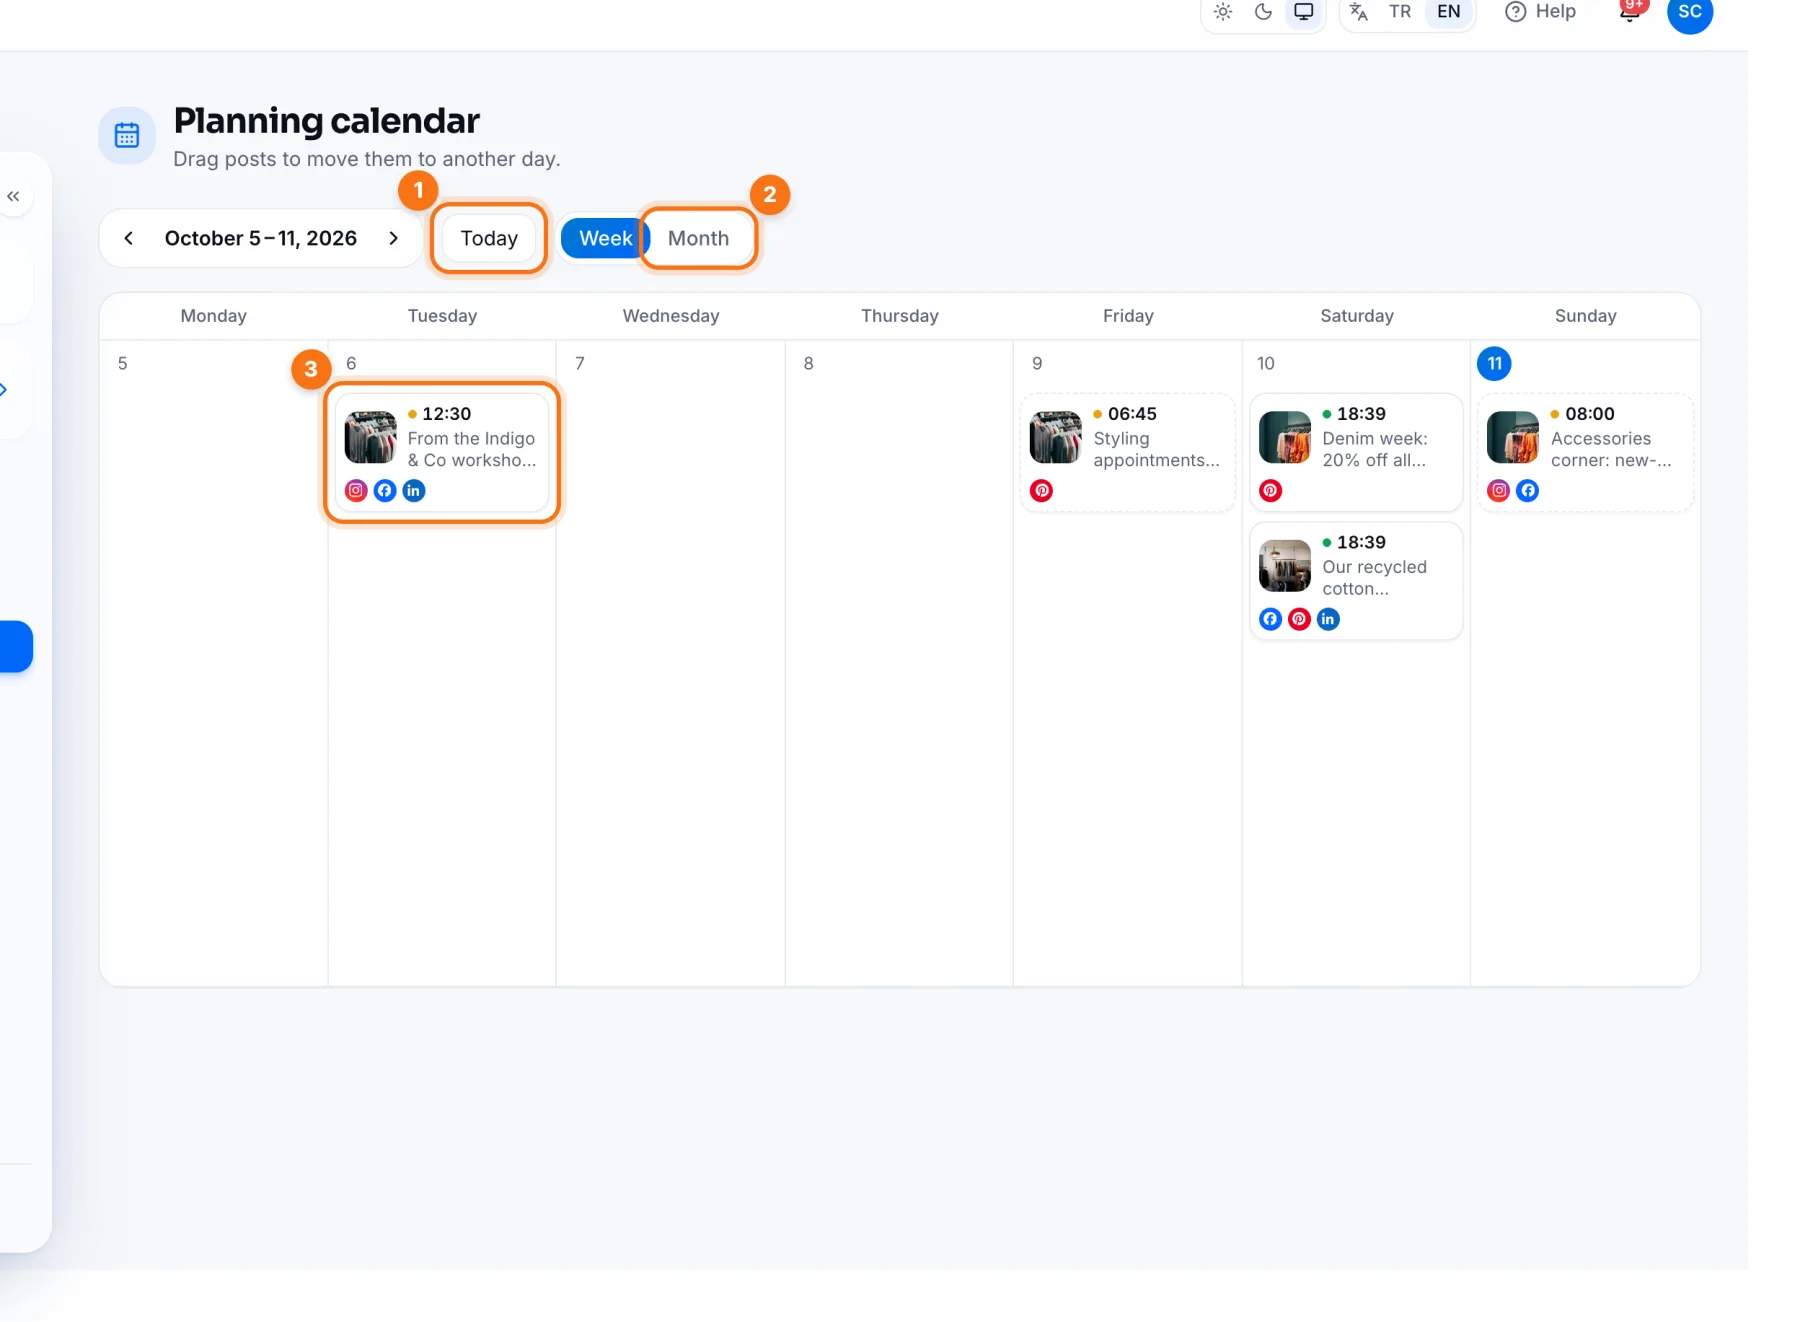 Planning Calendar: See and Move All Your Posts on One ScreenUsing the IZY Social Planning Calendar: week and month views, dragging posts to another day and adding posts to empty days.Step 4
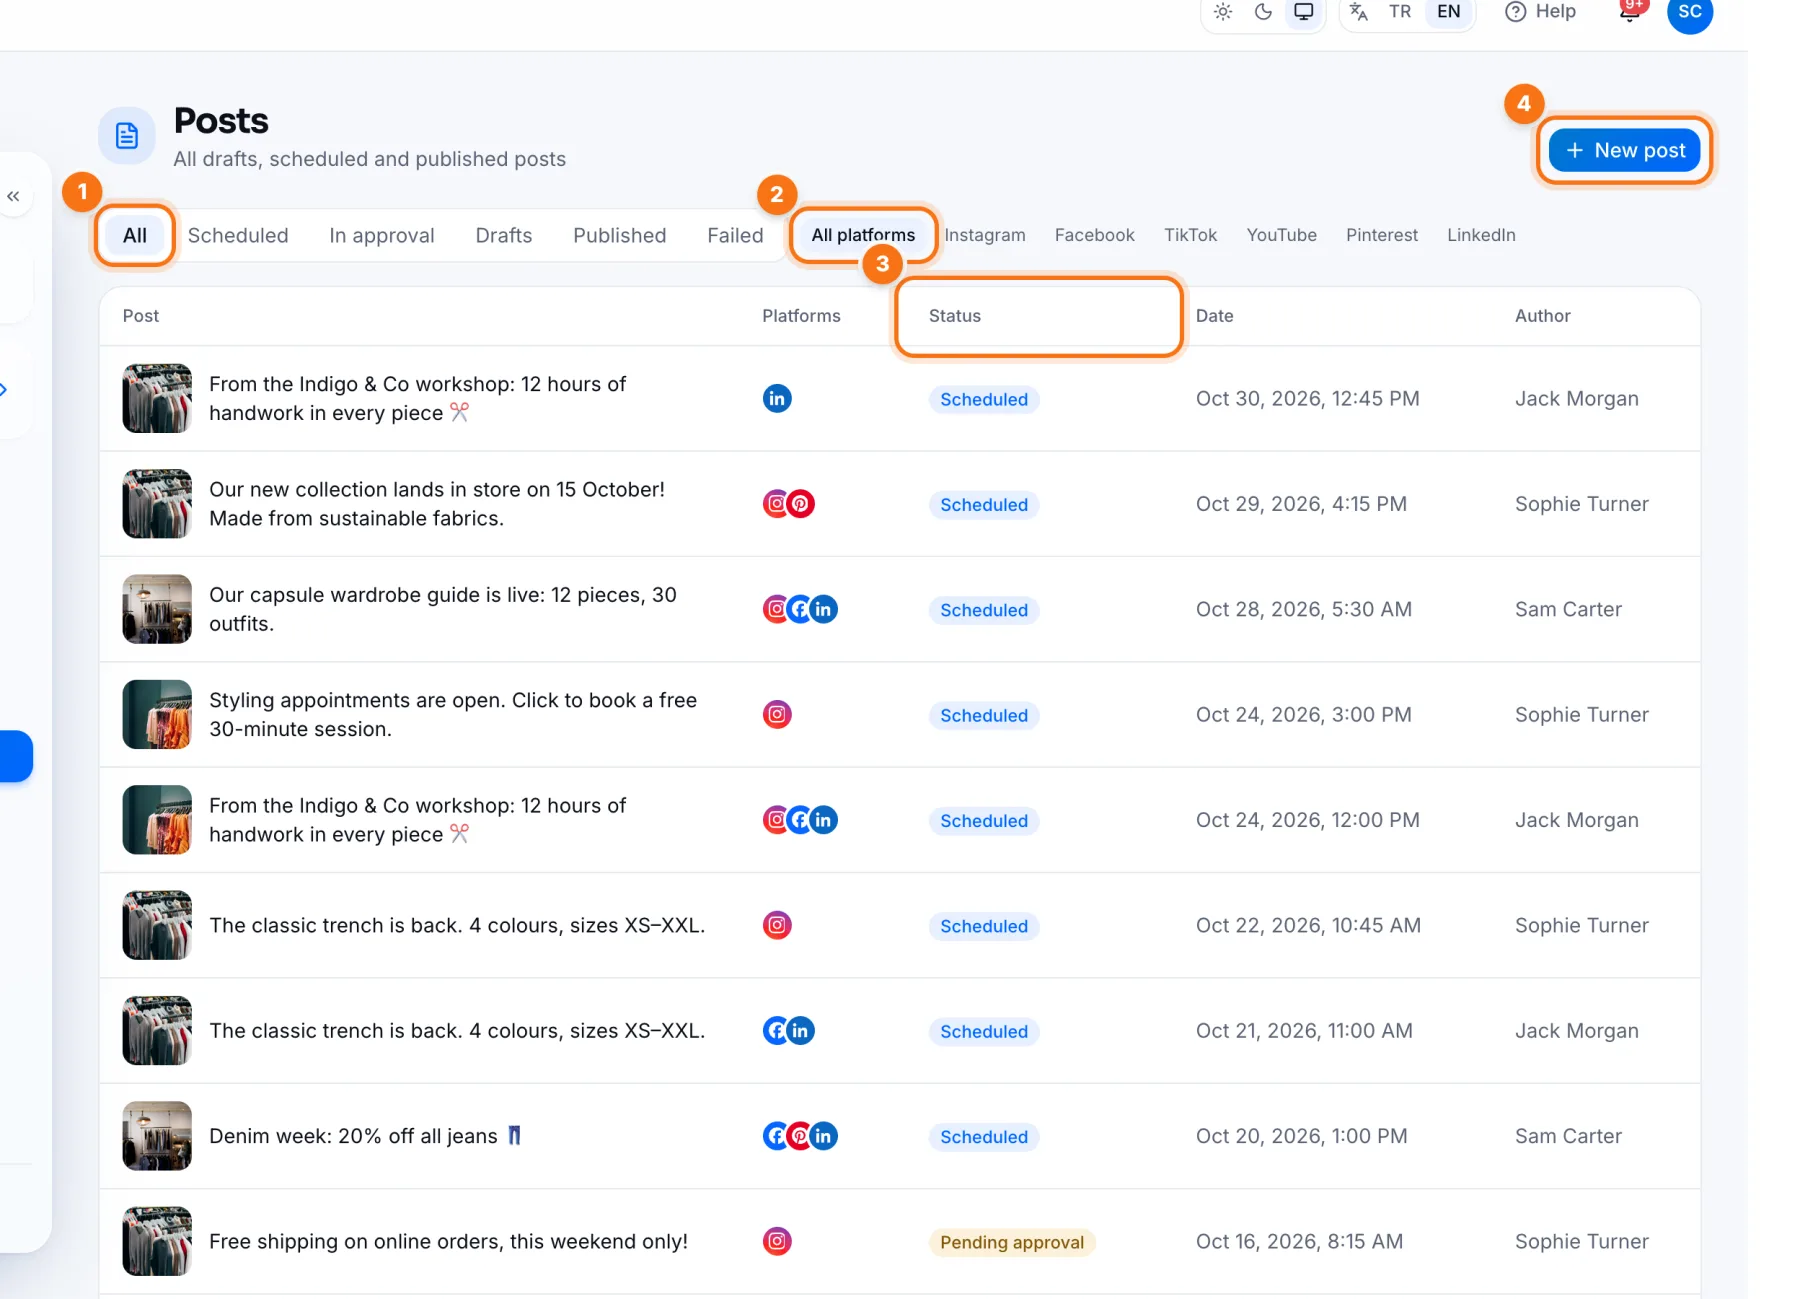 Posts: List, Filter and Fix Your PostsFiltering drafts, scheduled and published posts on the IZY Social Posts page, and retrying a post that failed.Step 5
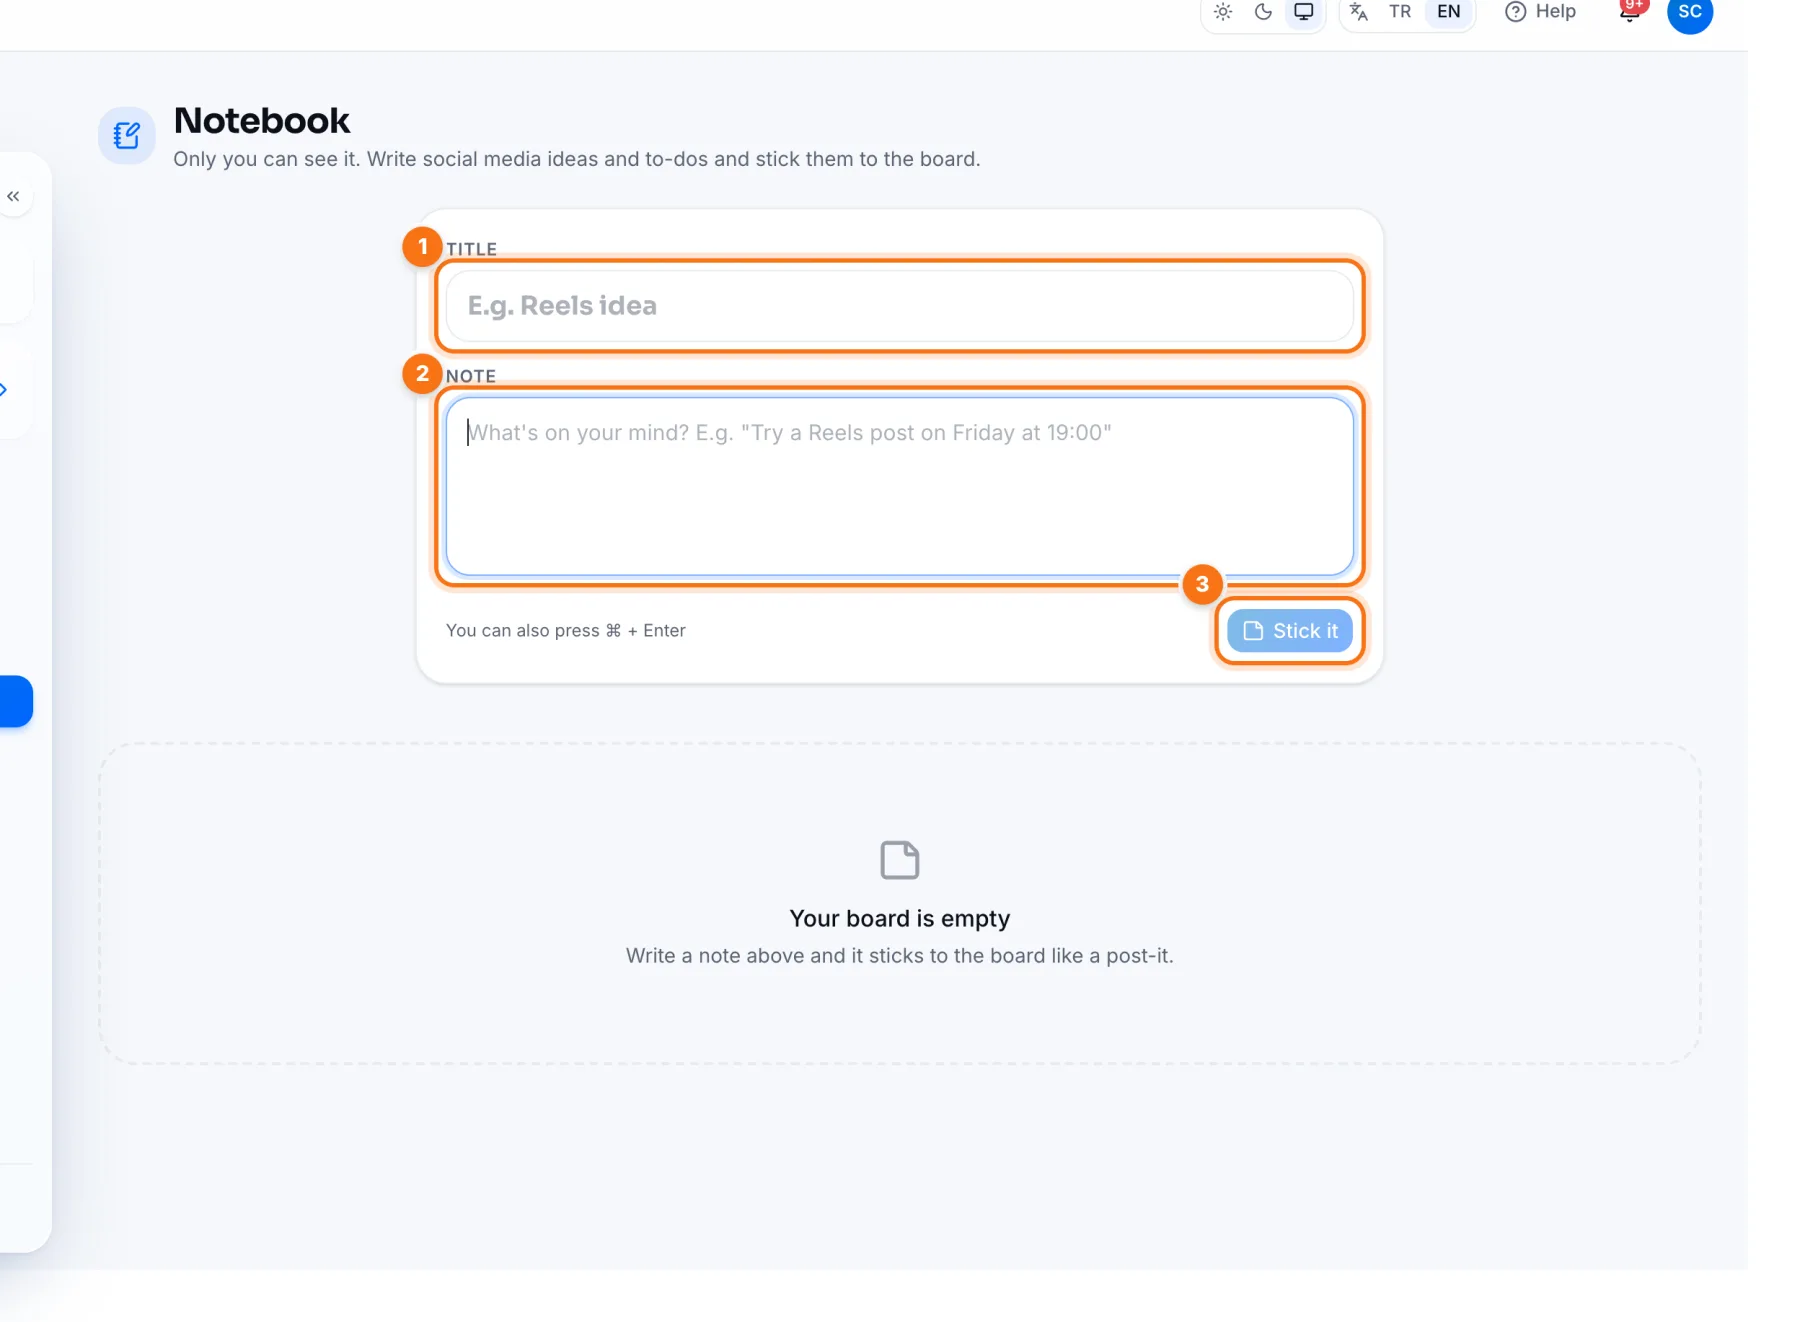 Notebook: Never Lose a Content IdeaSticking content ideas and to-dos to a board like Post-its in the IZY Social Notebook, pinning and searching them.Step 6
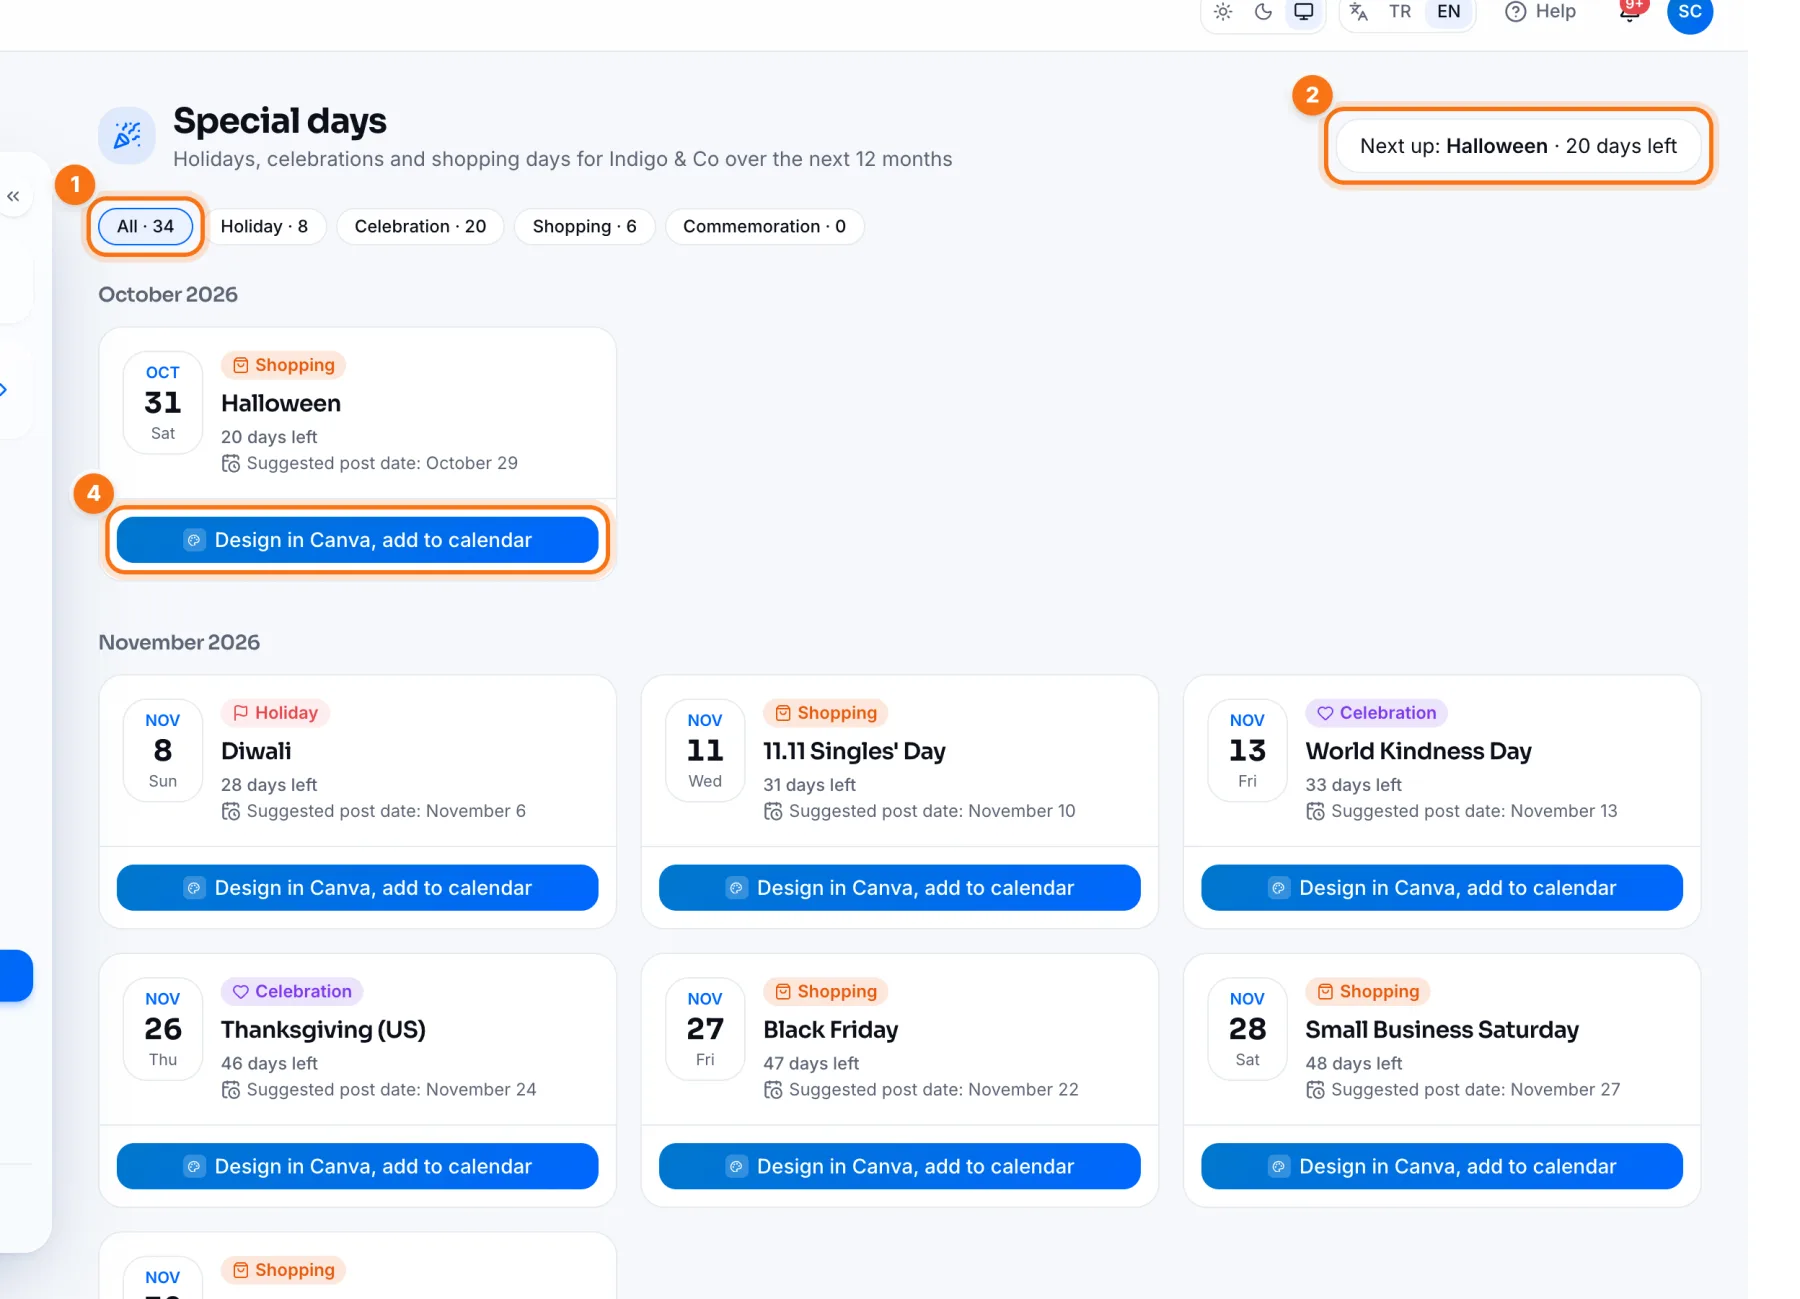 Special Days: Don't Miss Holidays and Shopping DaysThe IZY Social special days calendar: holidays, celebrations and shopping days for the next 12 months, suggested post dates and designing in Canva.Step 7
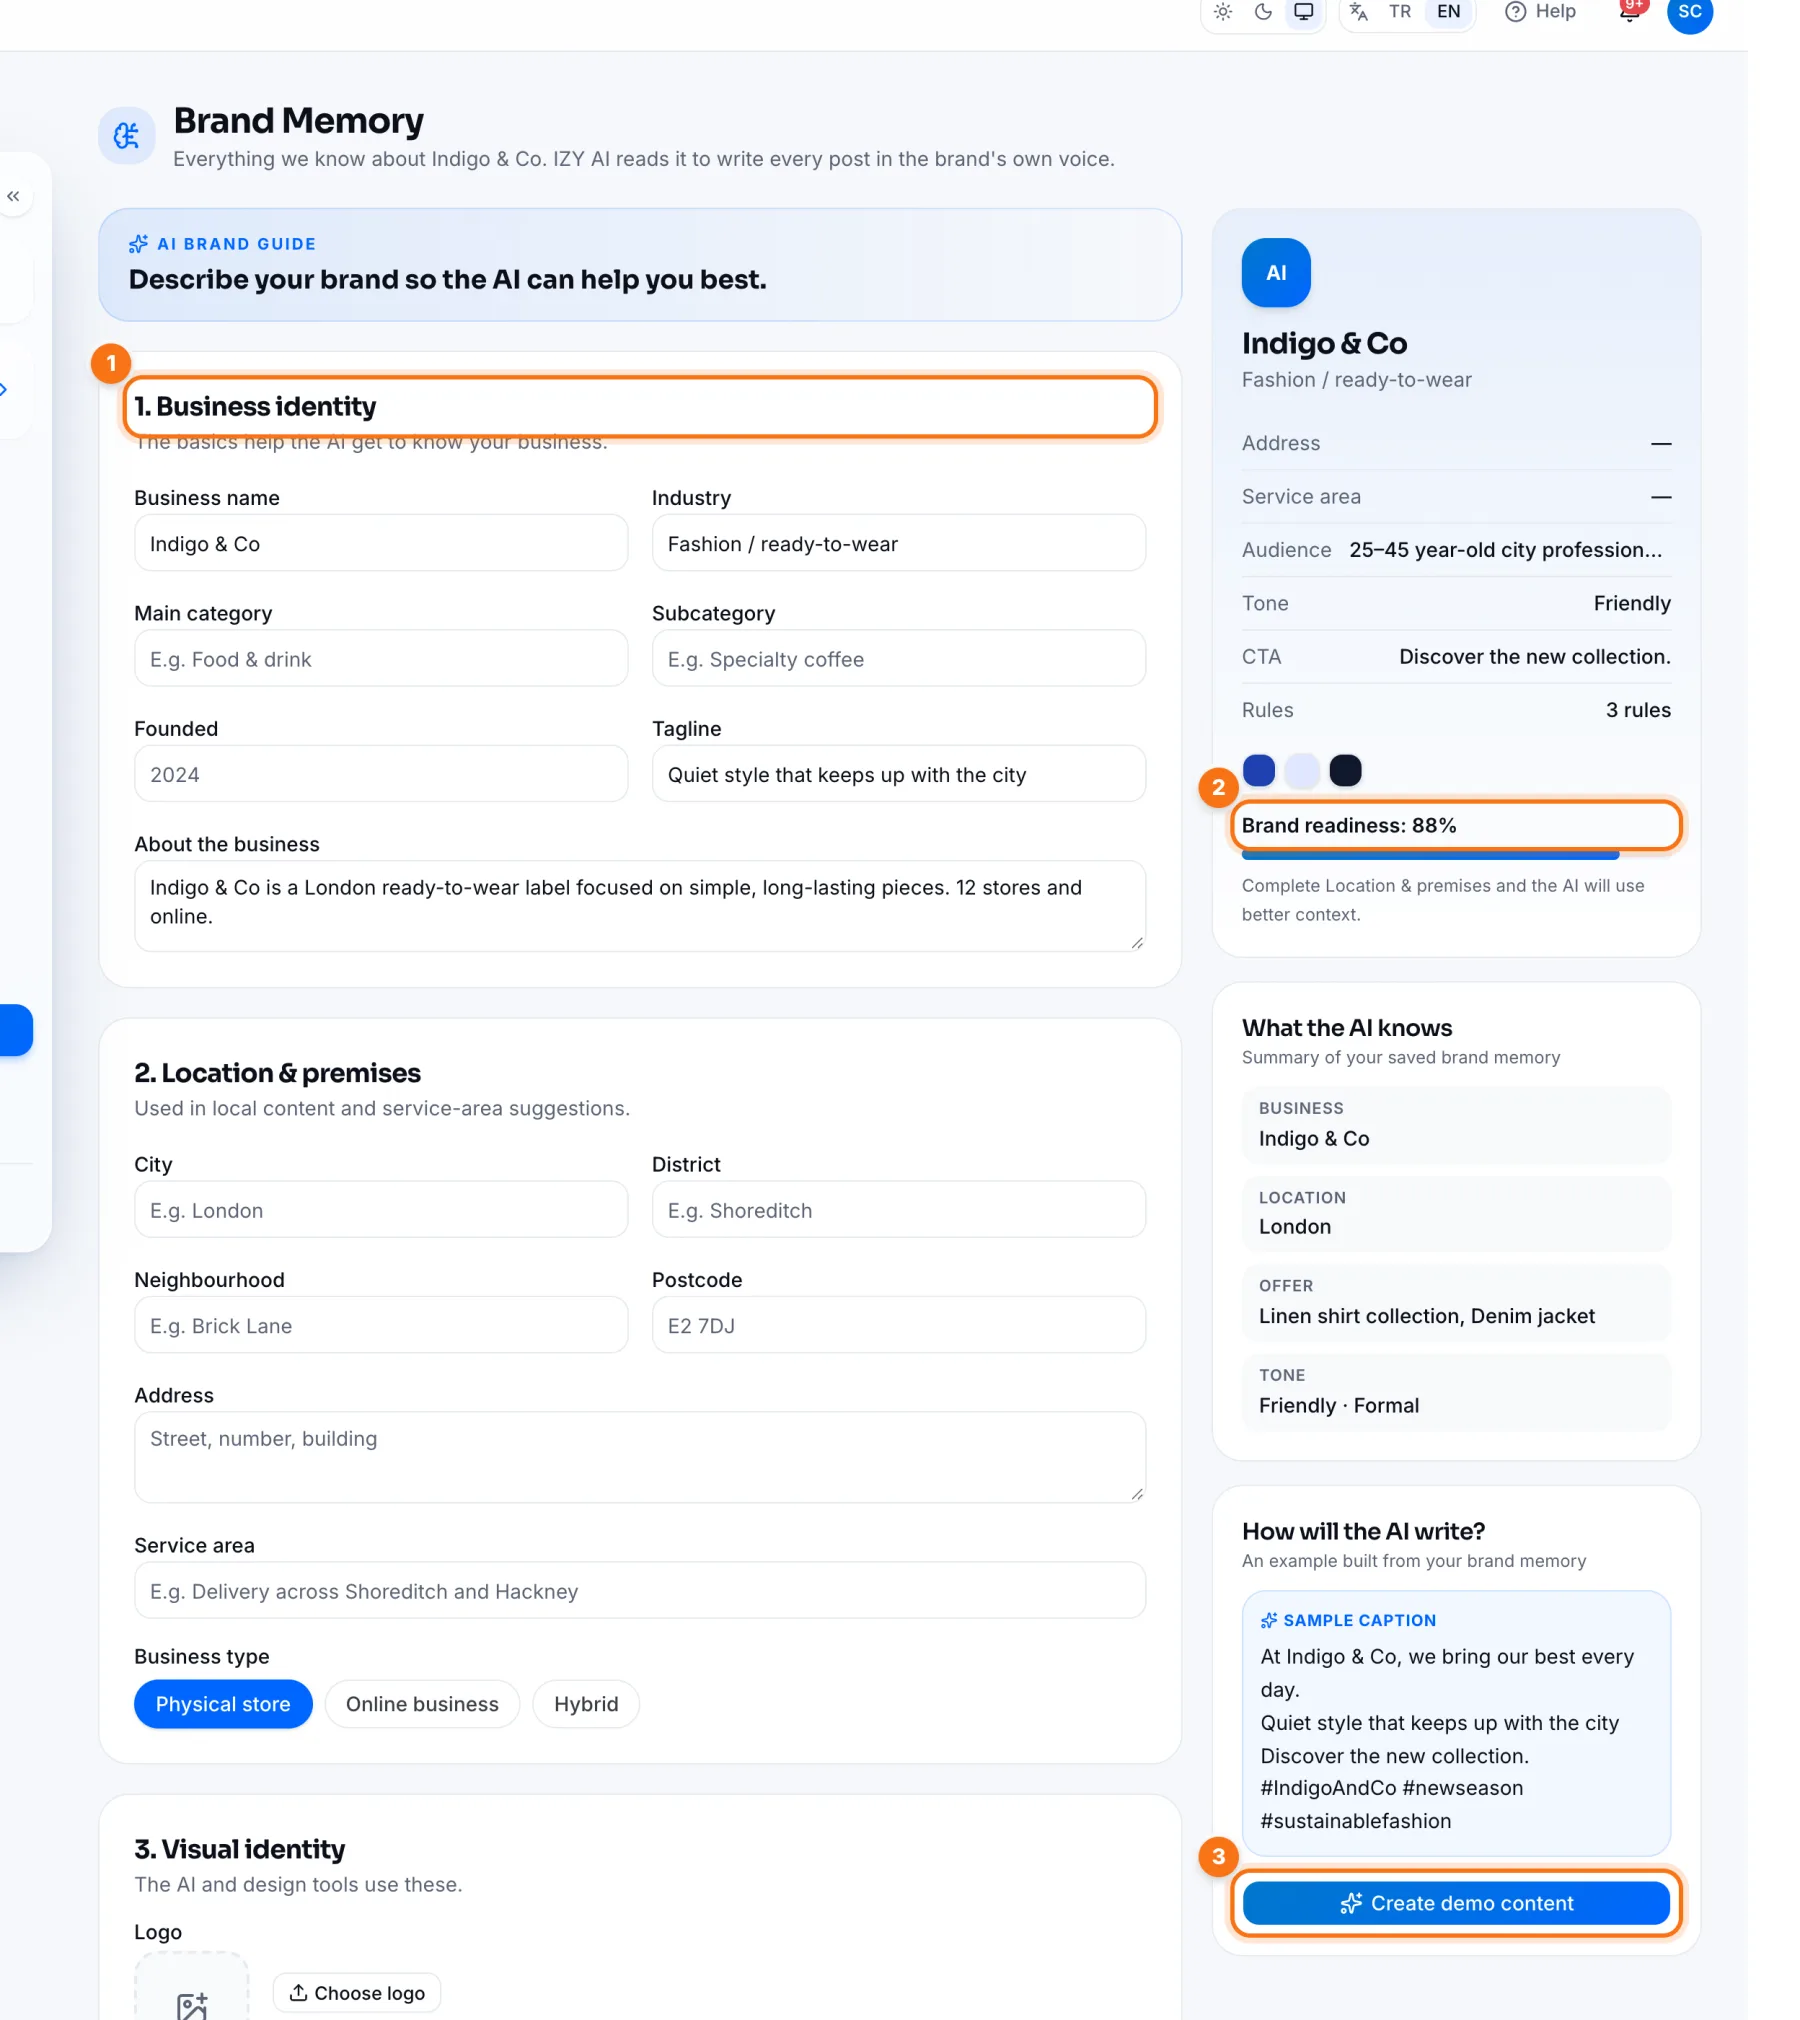 Brand Memory: Teach IZY AI About Your BrandFilling in IZY Social's Brand Memory: business identity, location, visual identity, products, audience, rules and contact details.Step 8
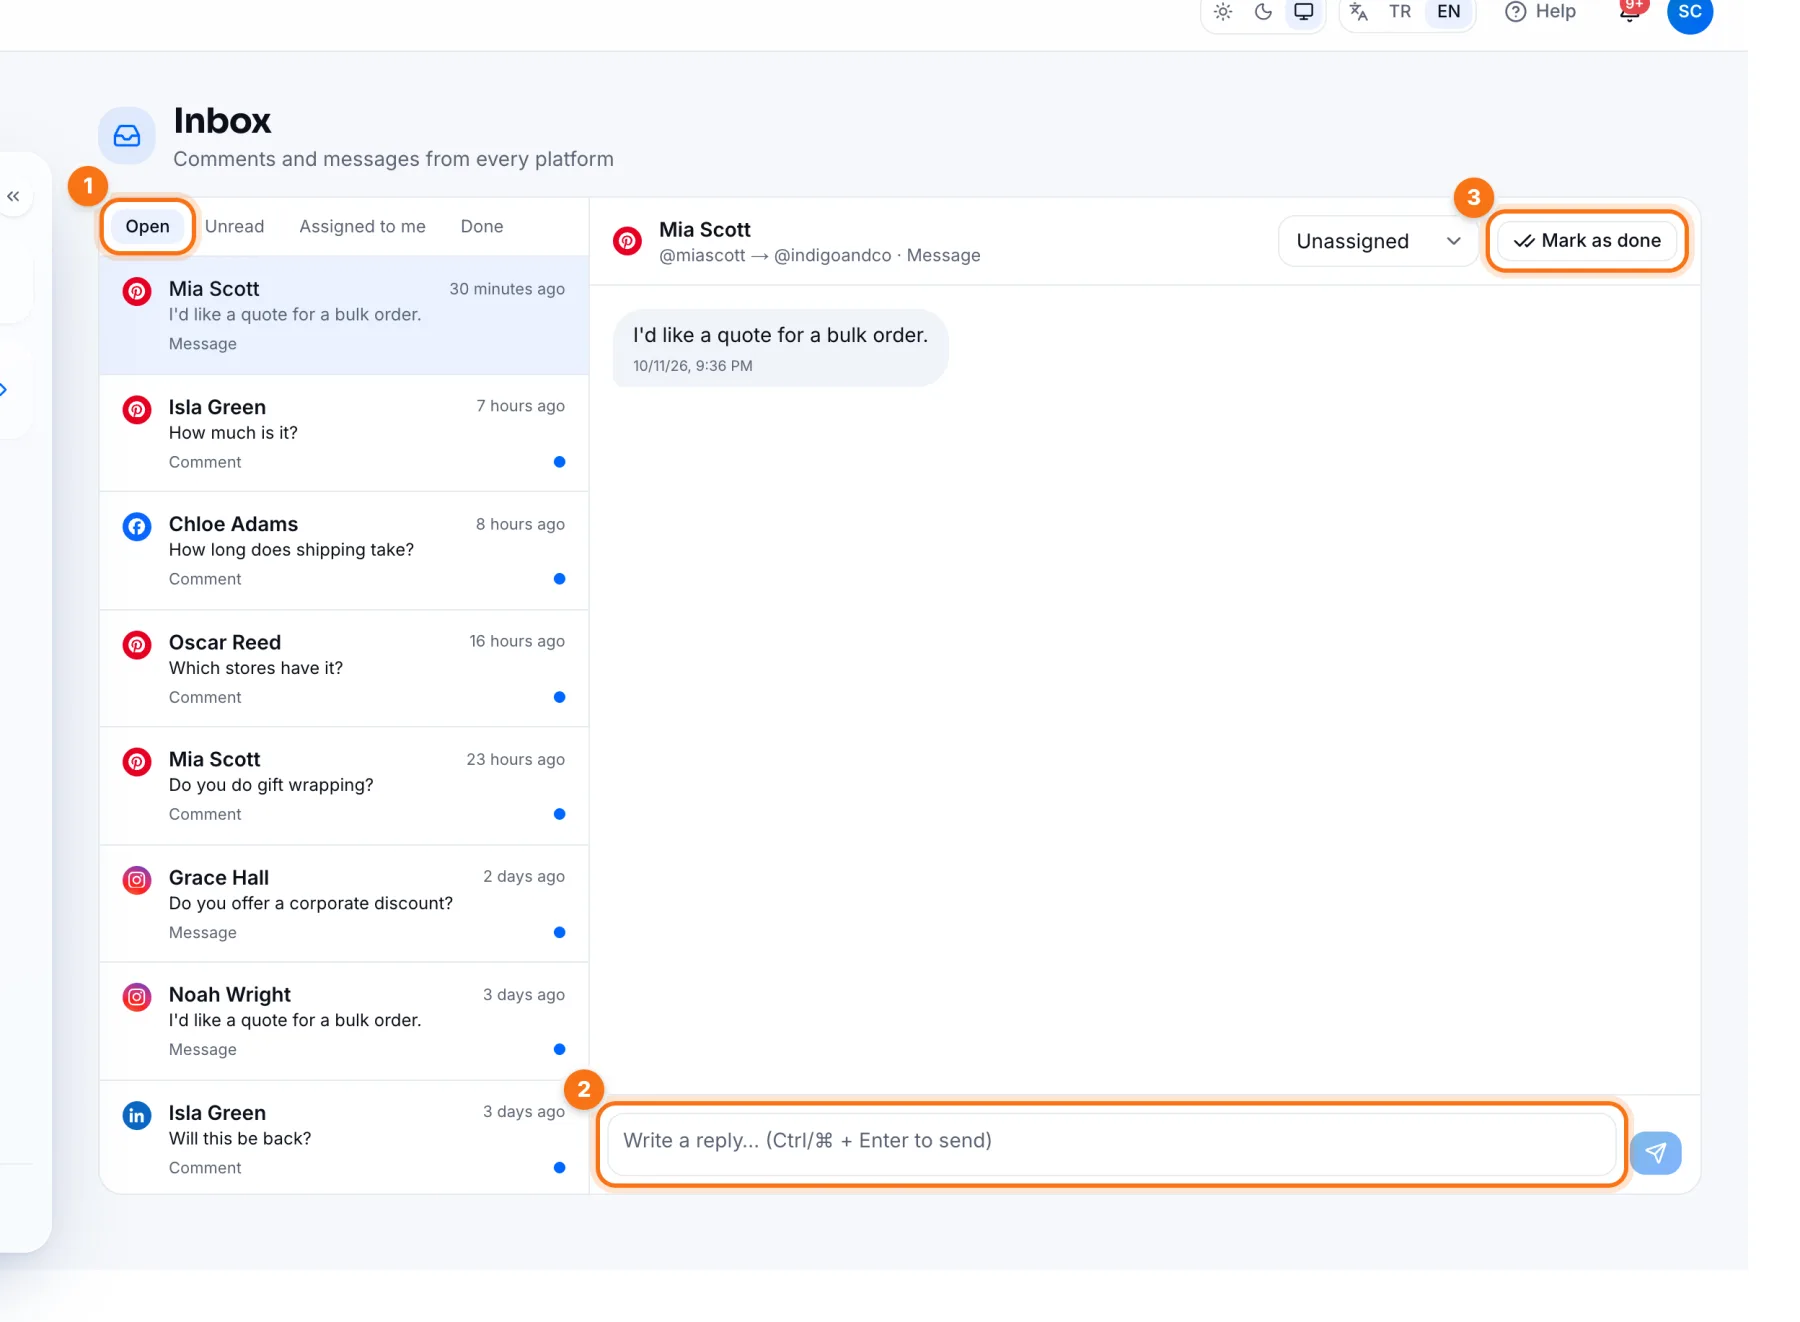 Inbox: Reply to Every Comment and Message in One PlaceReading, replying to and closing Instagram, Facebook, YouTube, LinkedIn and Pinterest comments and messages in the IZY Social Inbox.Step 9
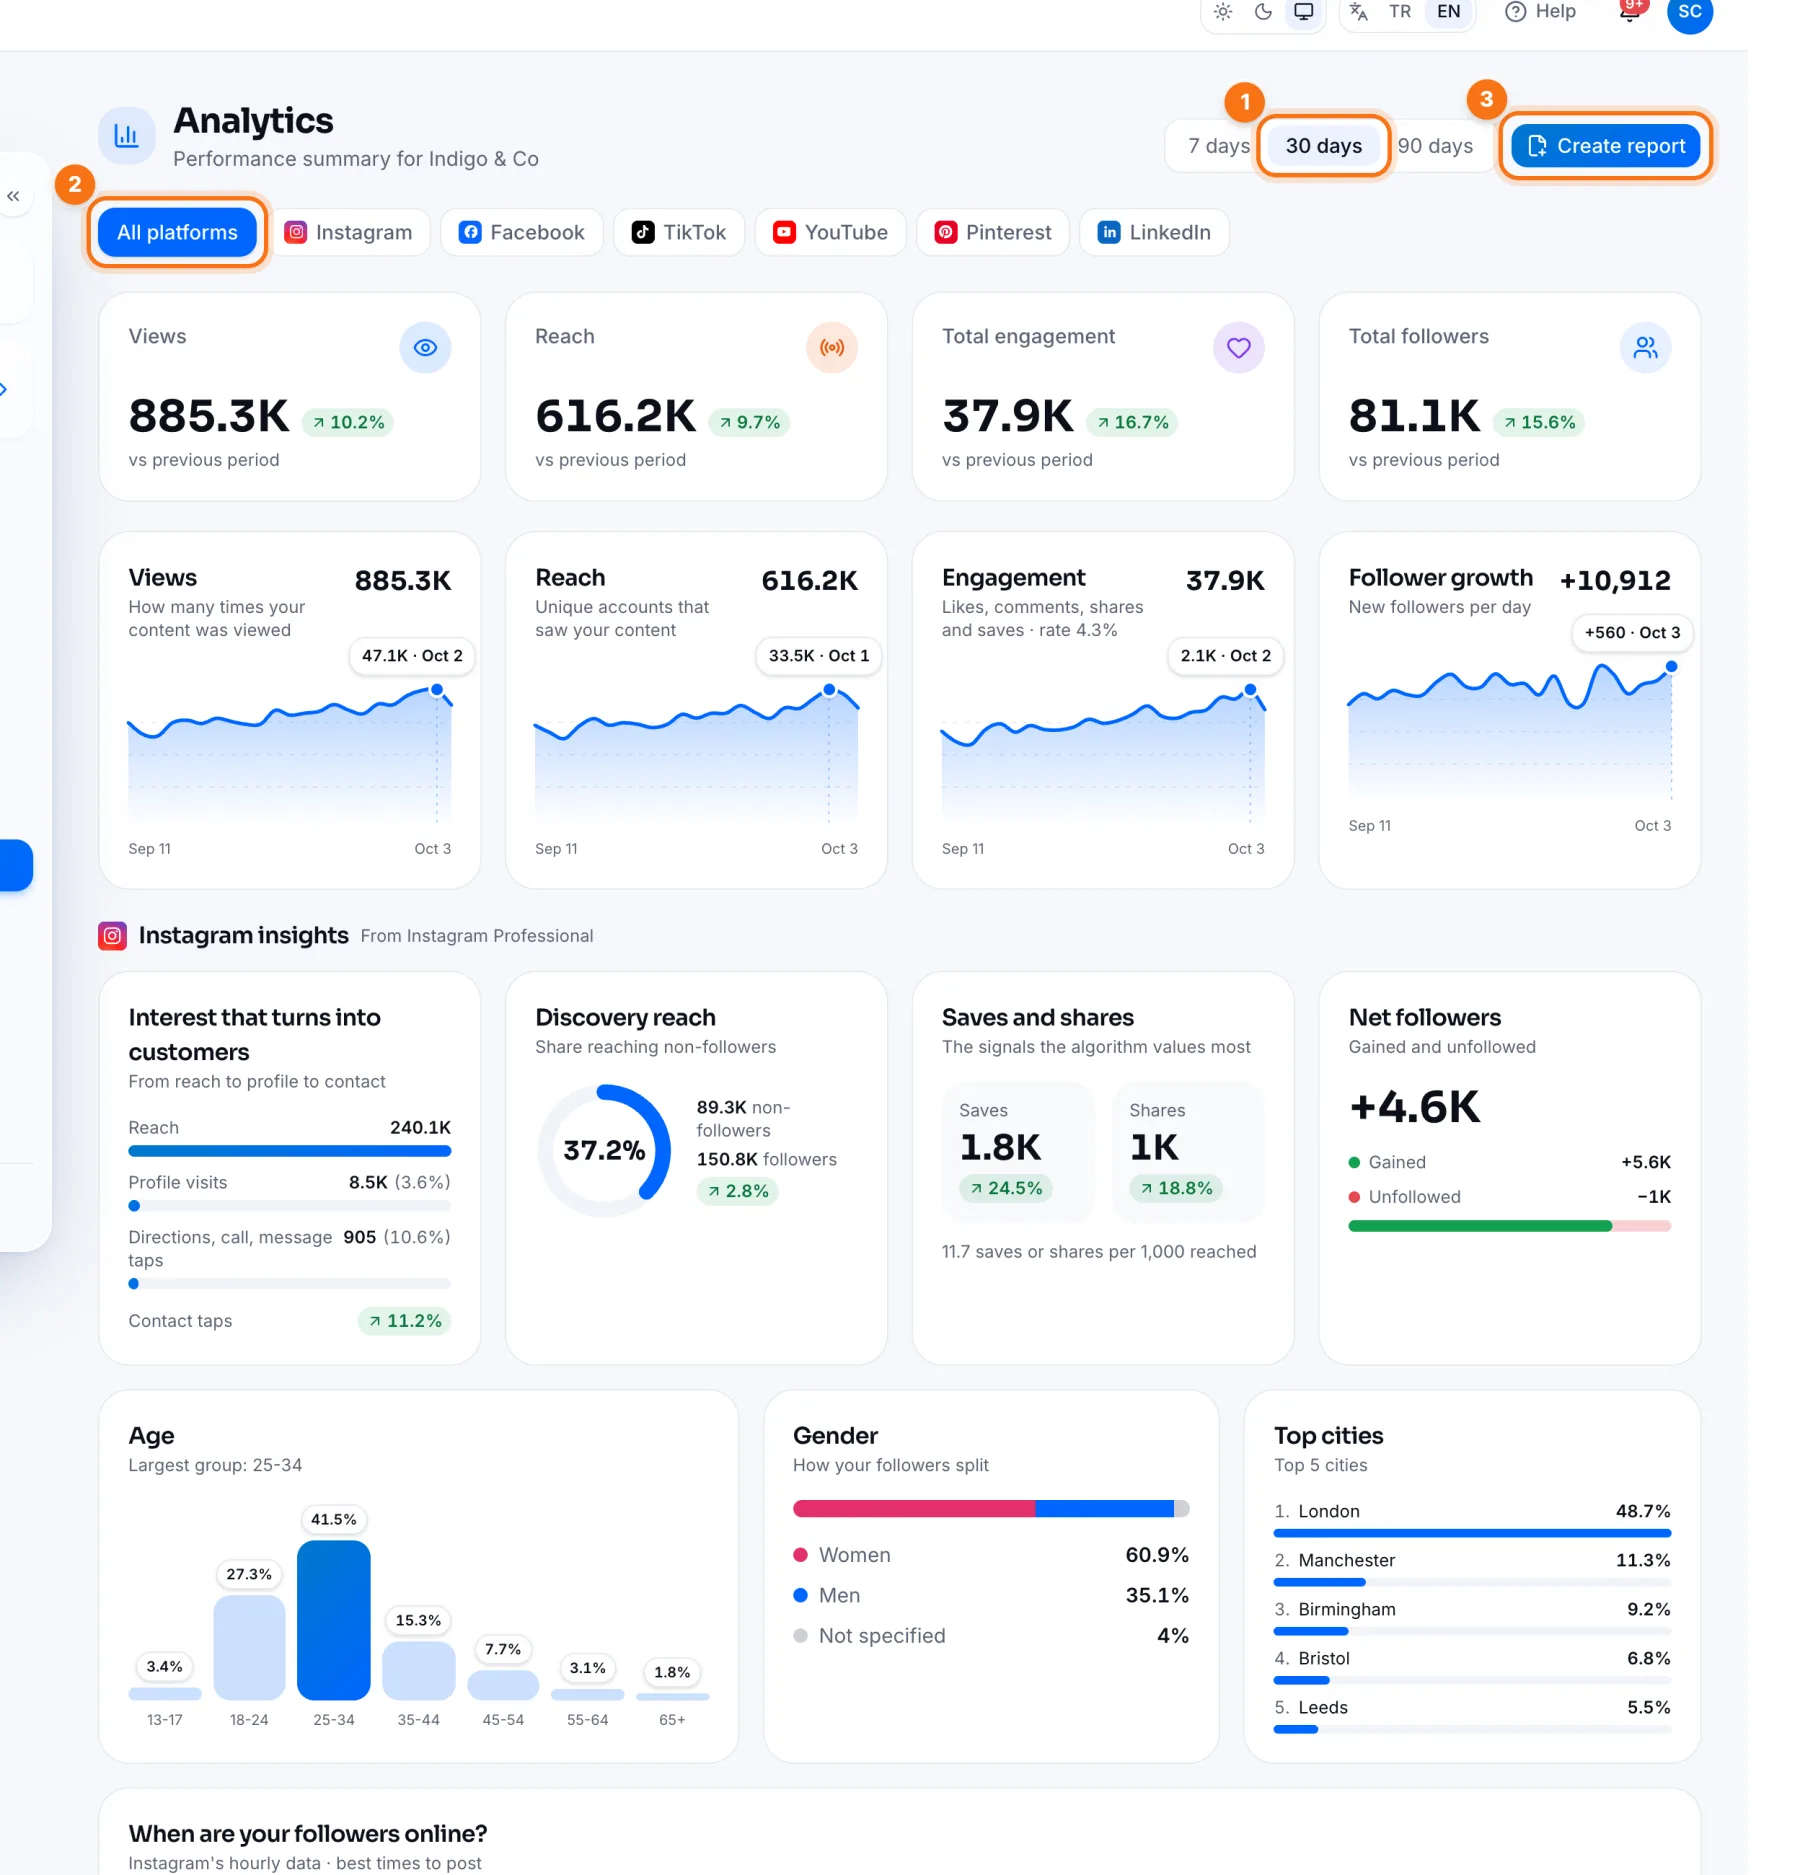 Analytics: What Worked and WhyViews, reach, engagement and followers in IZY Social Analytics; Instagram insights, best times, Reels performance and platform comparison.Step 10
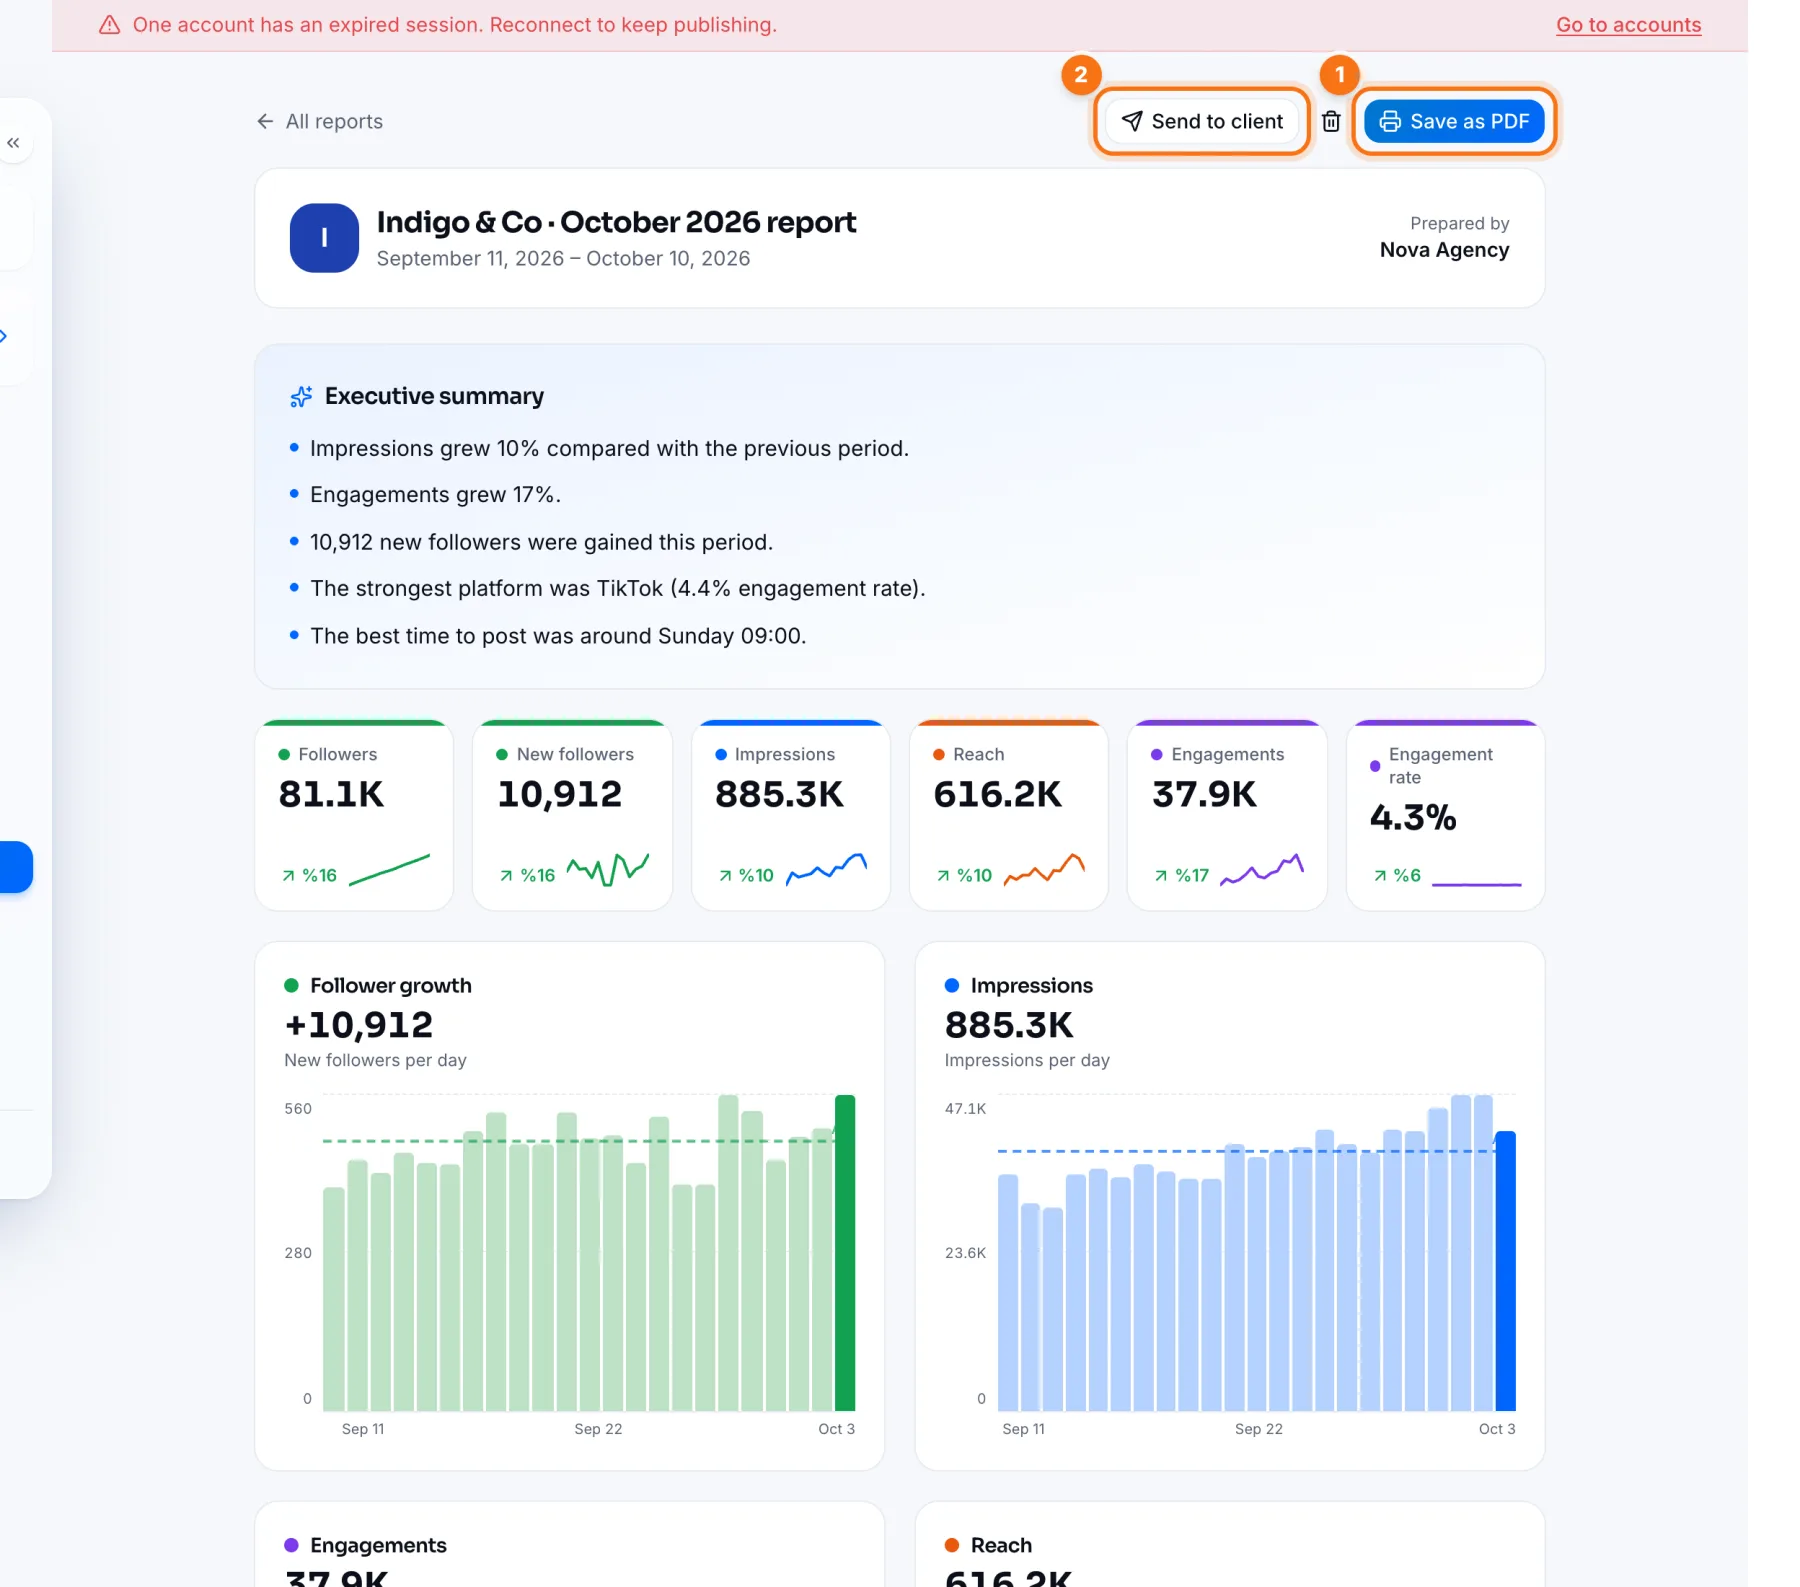 Reports: Save a Period Report and Download It as PDFCreating reports from your analytics in IZY Social, opening saved reports and saving them as PDF.Step 11
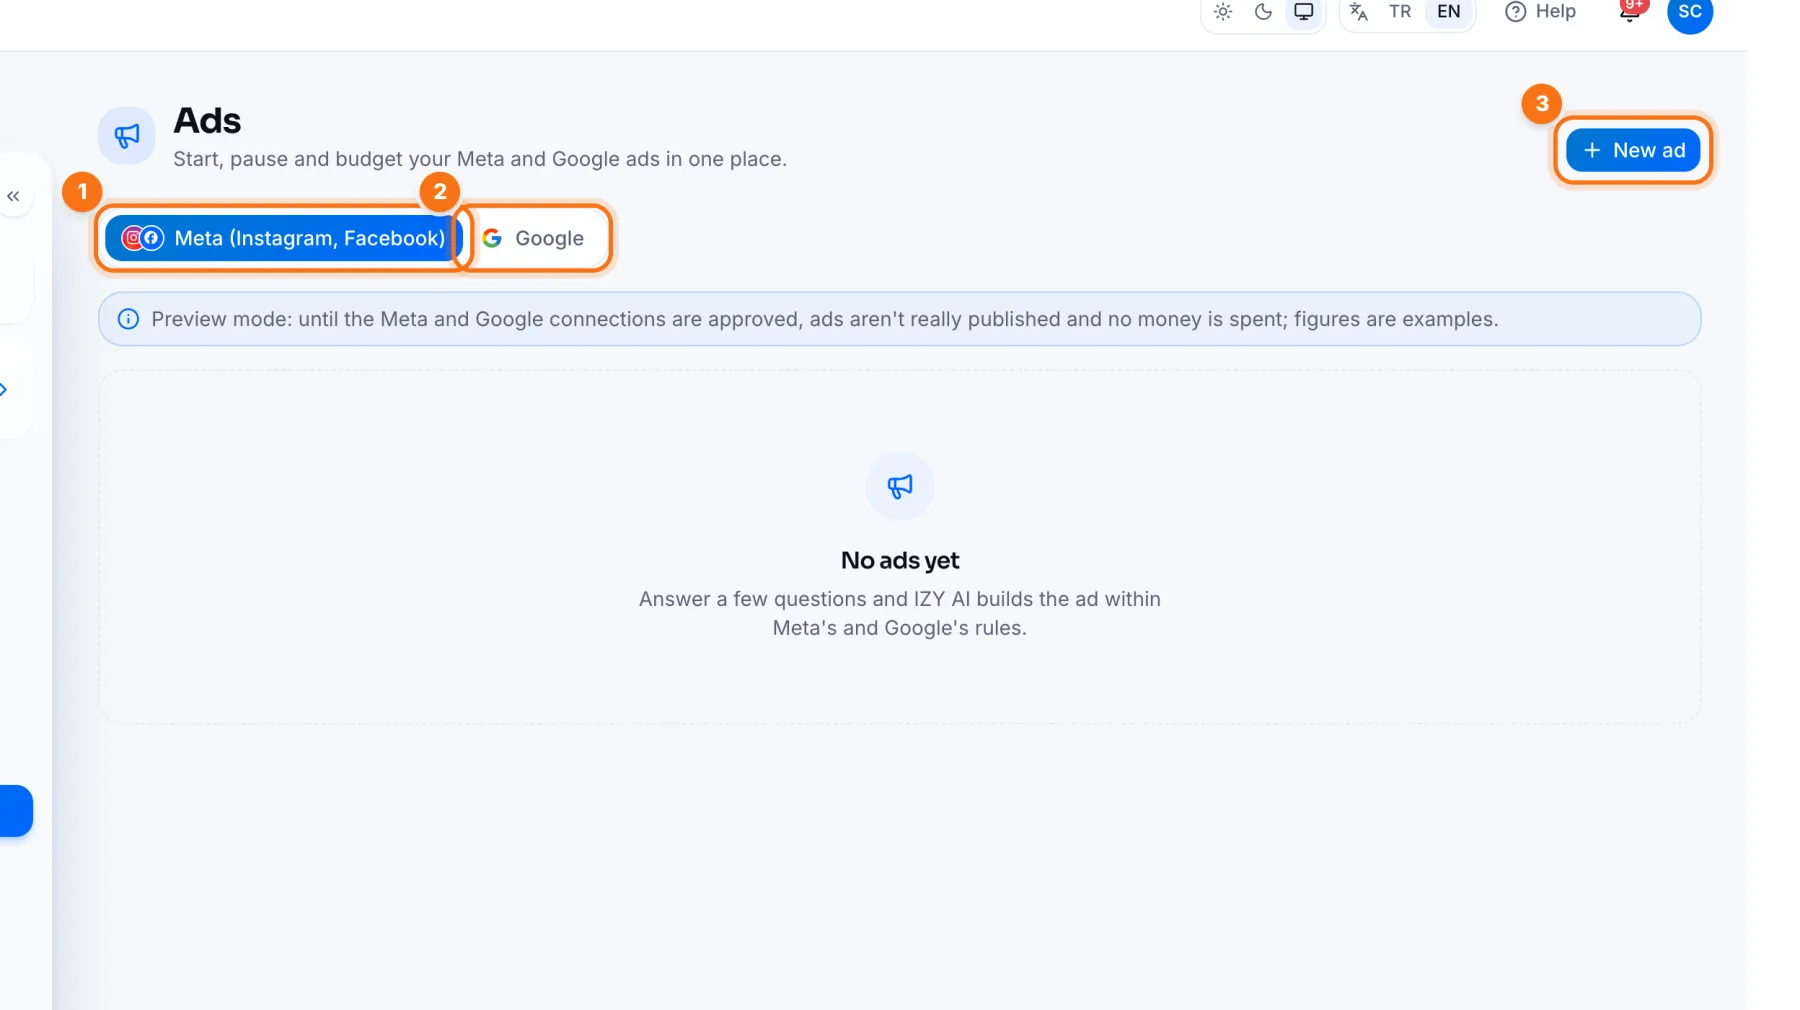 Ads: Launch Meta and Google Ads by Answering a Few QuestionsCreating Meta (Instagram, Facebook) and Google ads in IZY Social: goal, post, location and daily budget.Step 12
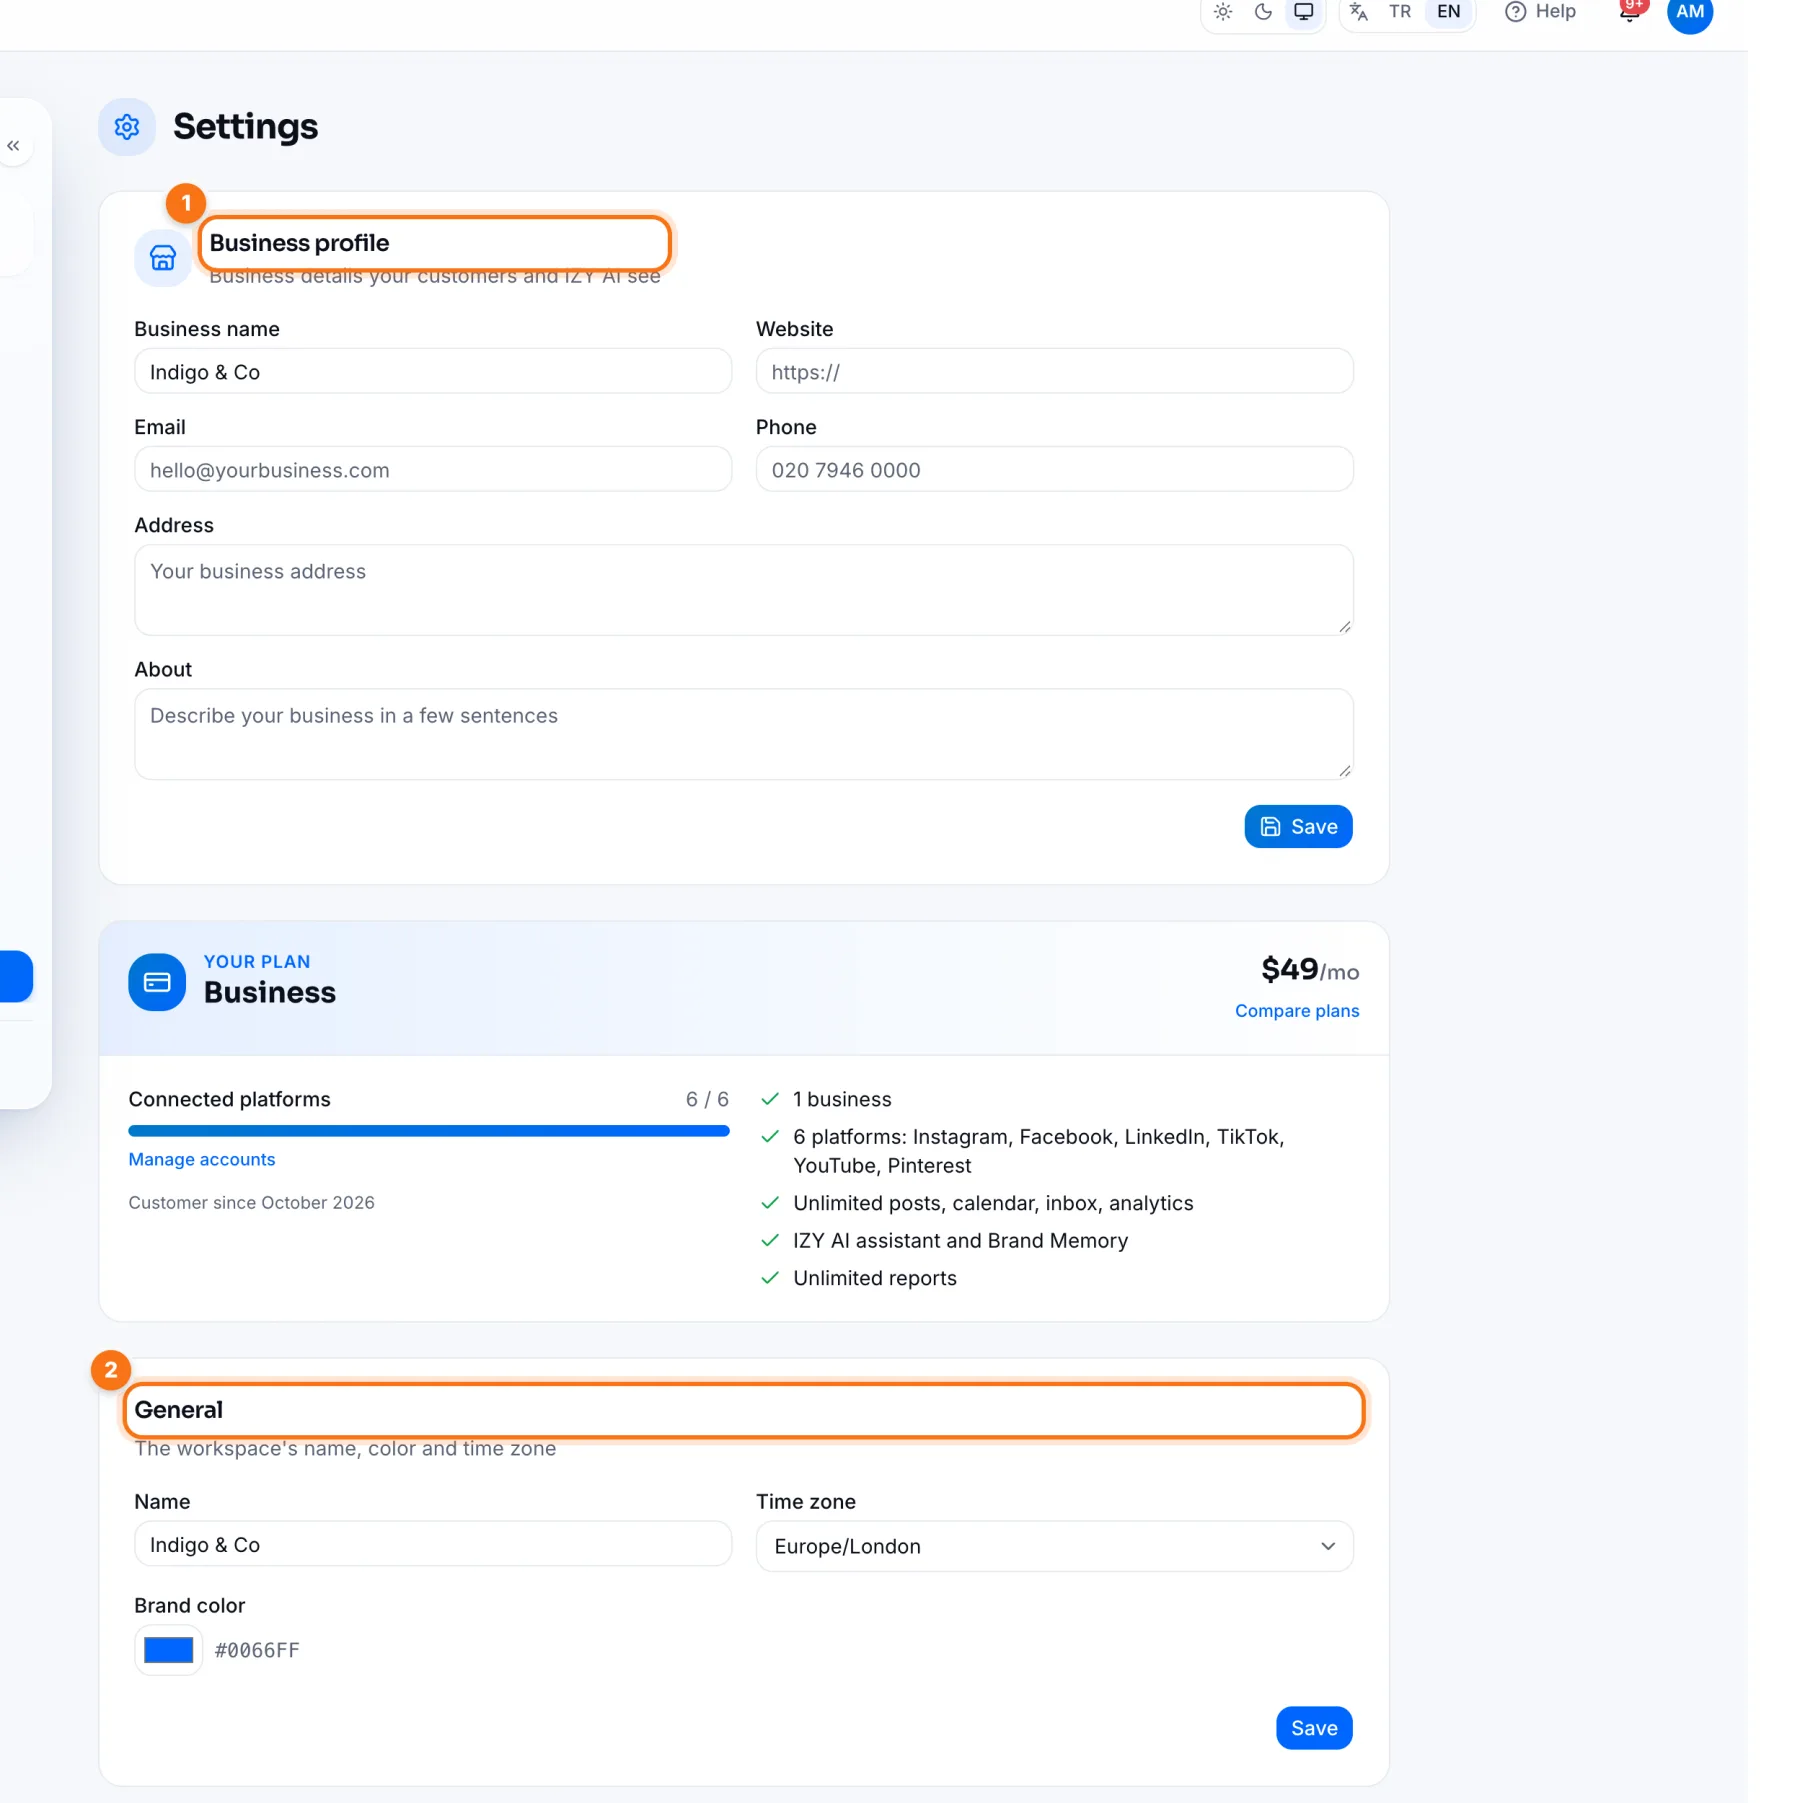 Settings: Business Profile, Plan and Time ZoneIZY Social business settings: business profile, plan details, workspace name, time zone and brand colour.Step 13
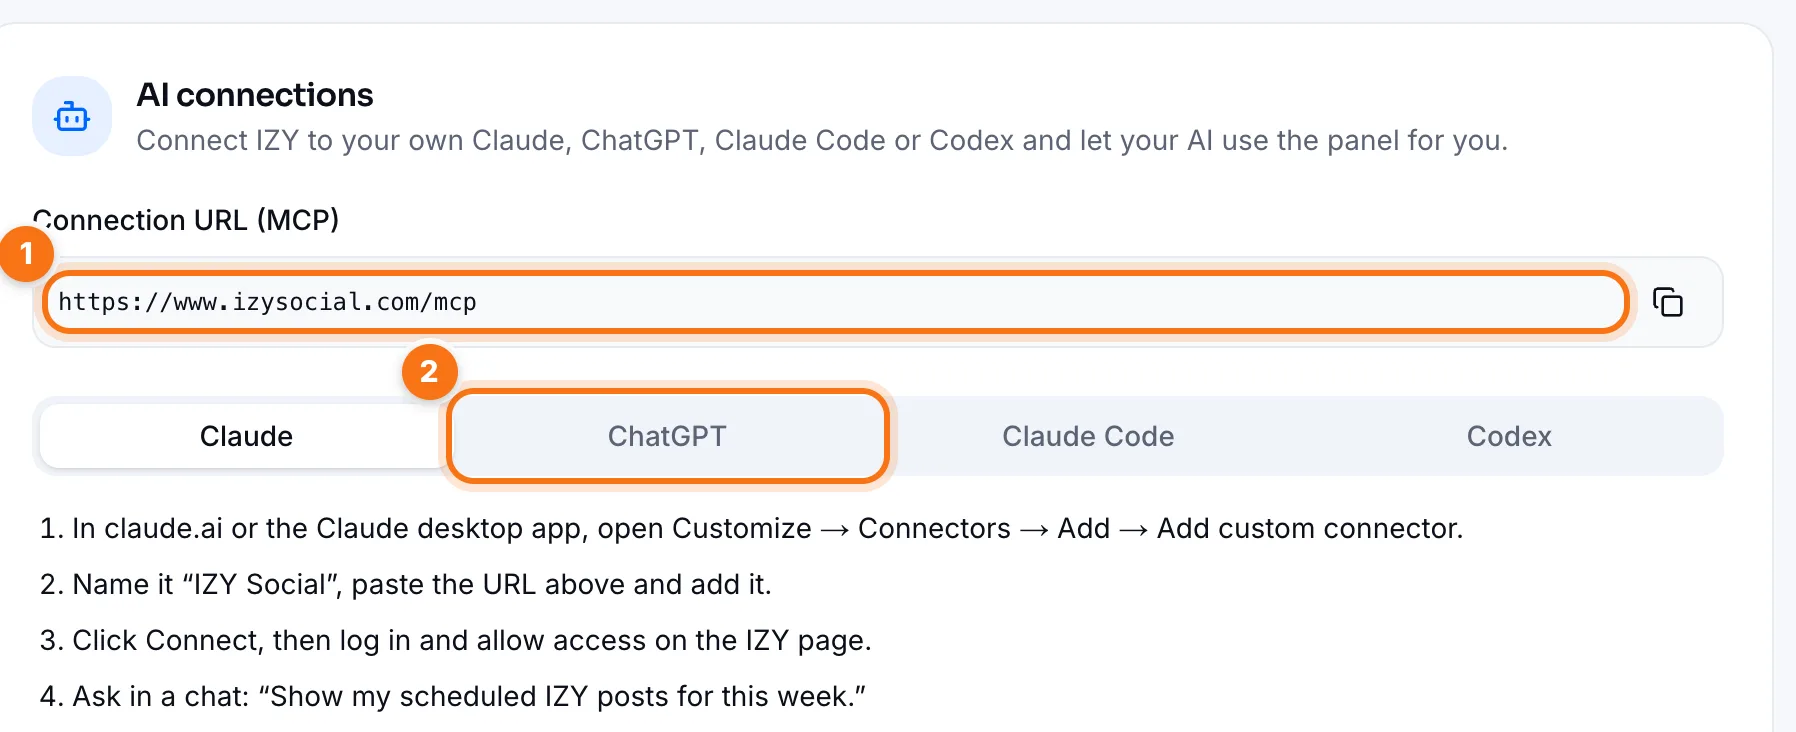 Connect Claude and ChatGPT to IZY SocialConnect IZY Social to Claude, ChatGPT, Claude Code or Codex and manage your posts, calendar and reports by chatting. Step-by-step setup.Step 14
Agency panel
If you manage several clients' accounts.
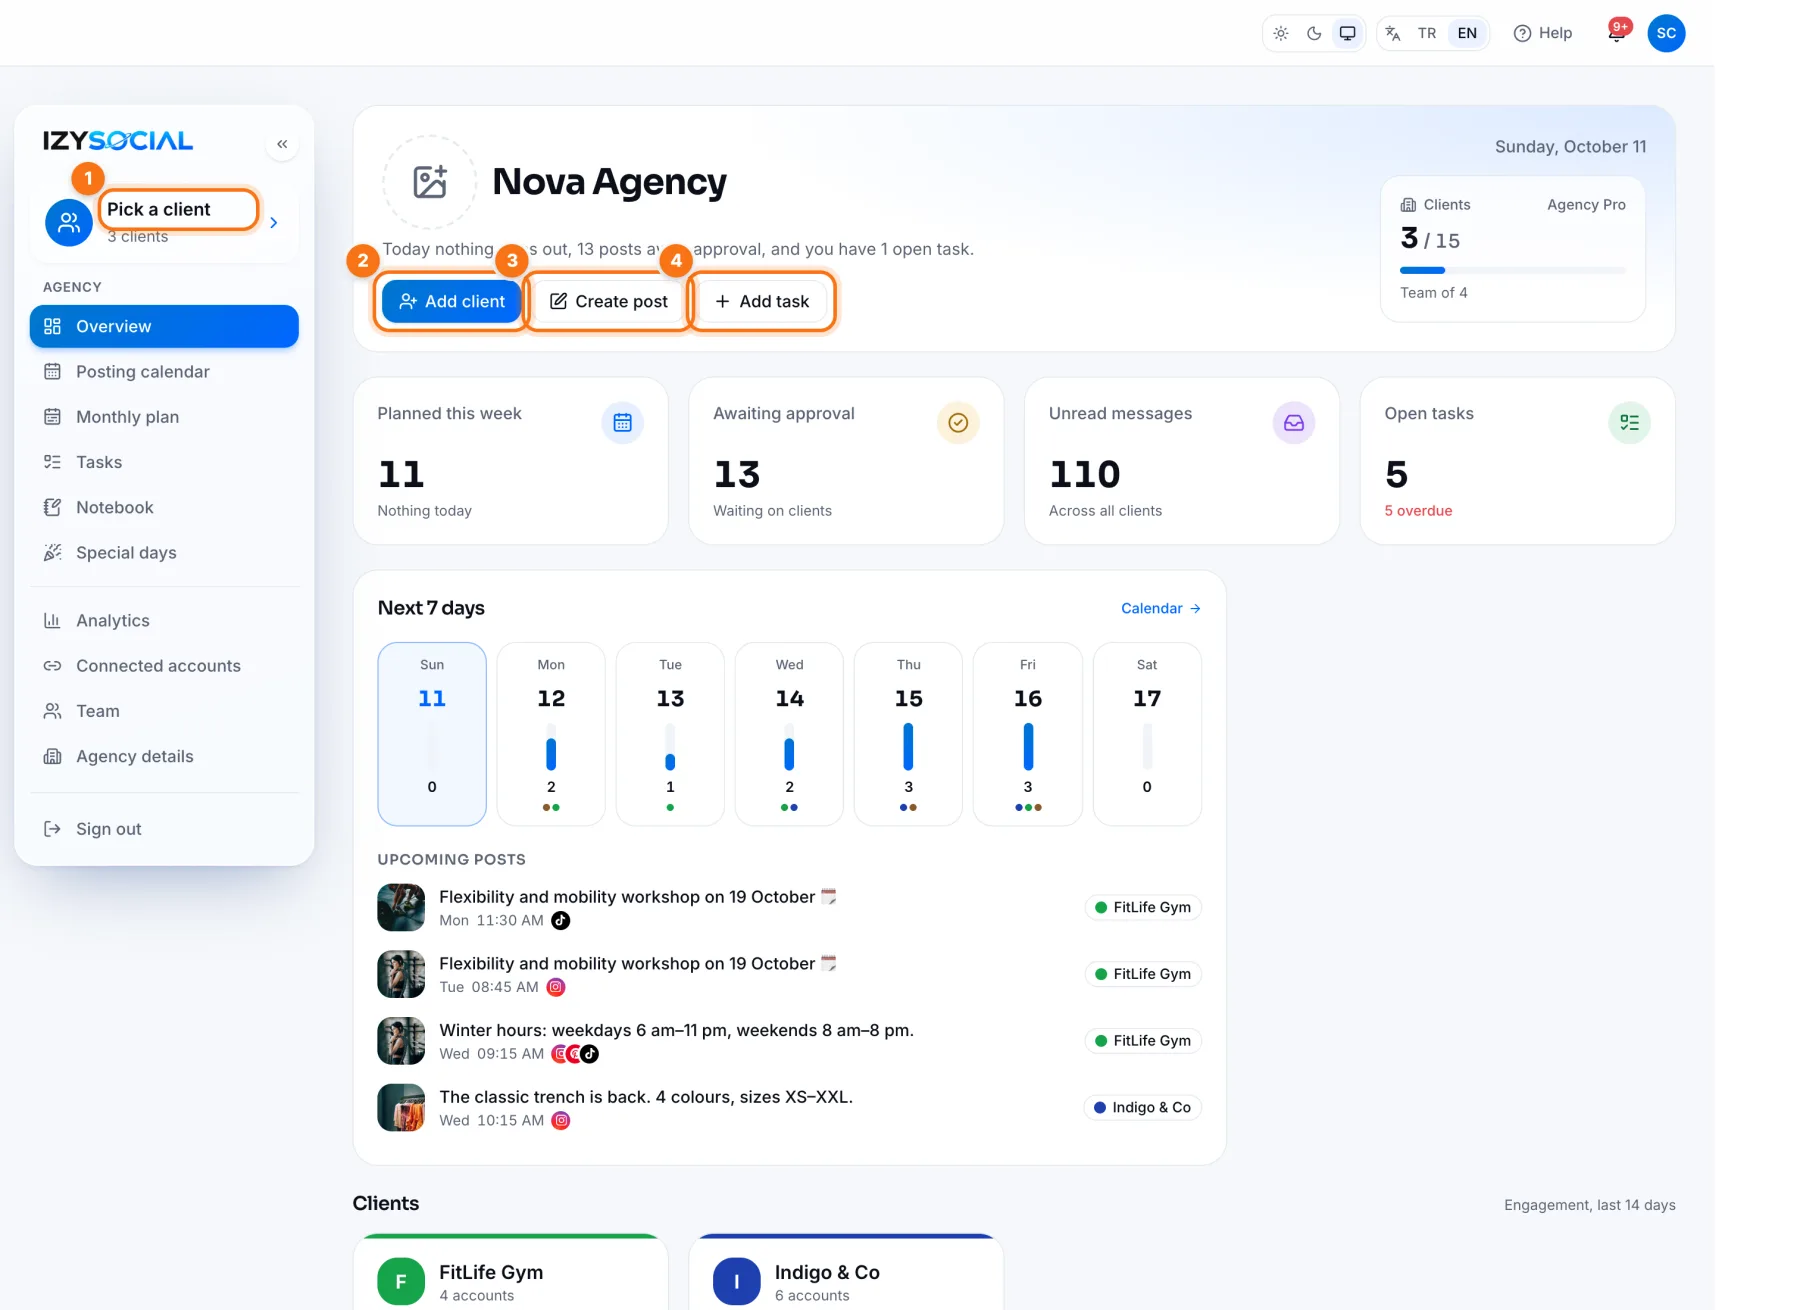 Agency Panel: Overview and Switching Between ClientsSeeing all clients on one screen in the IZY Social agency panel, switching between client panels and planning the day.Step 1
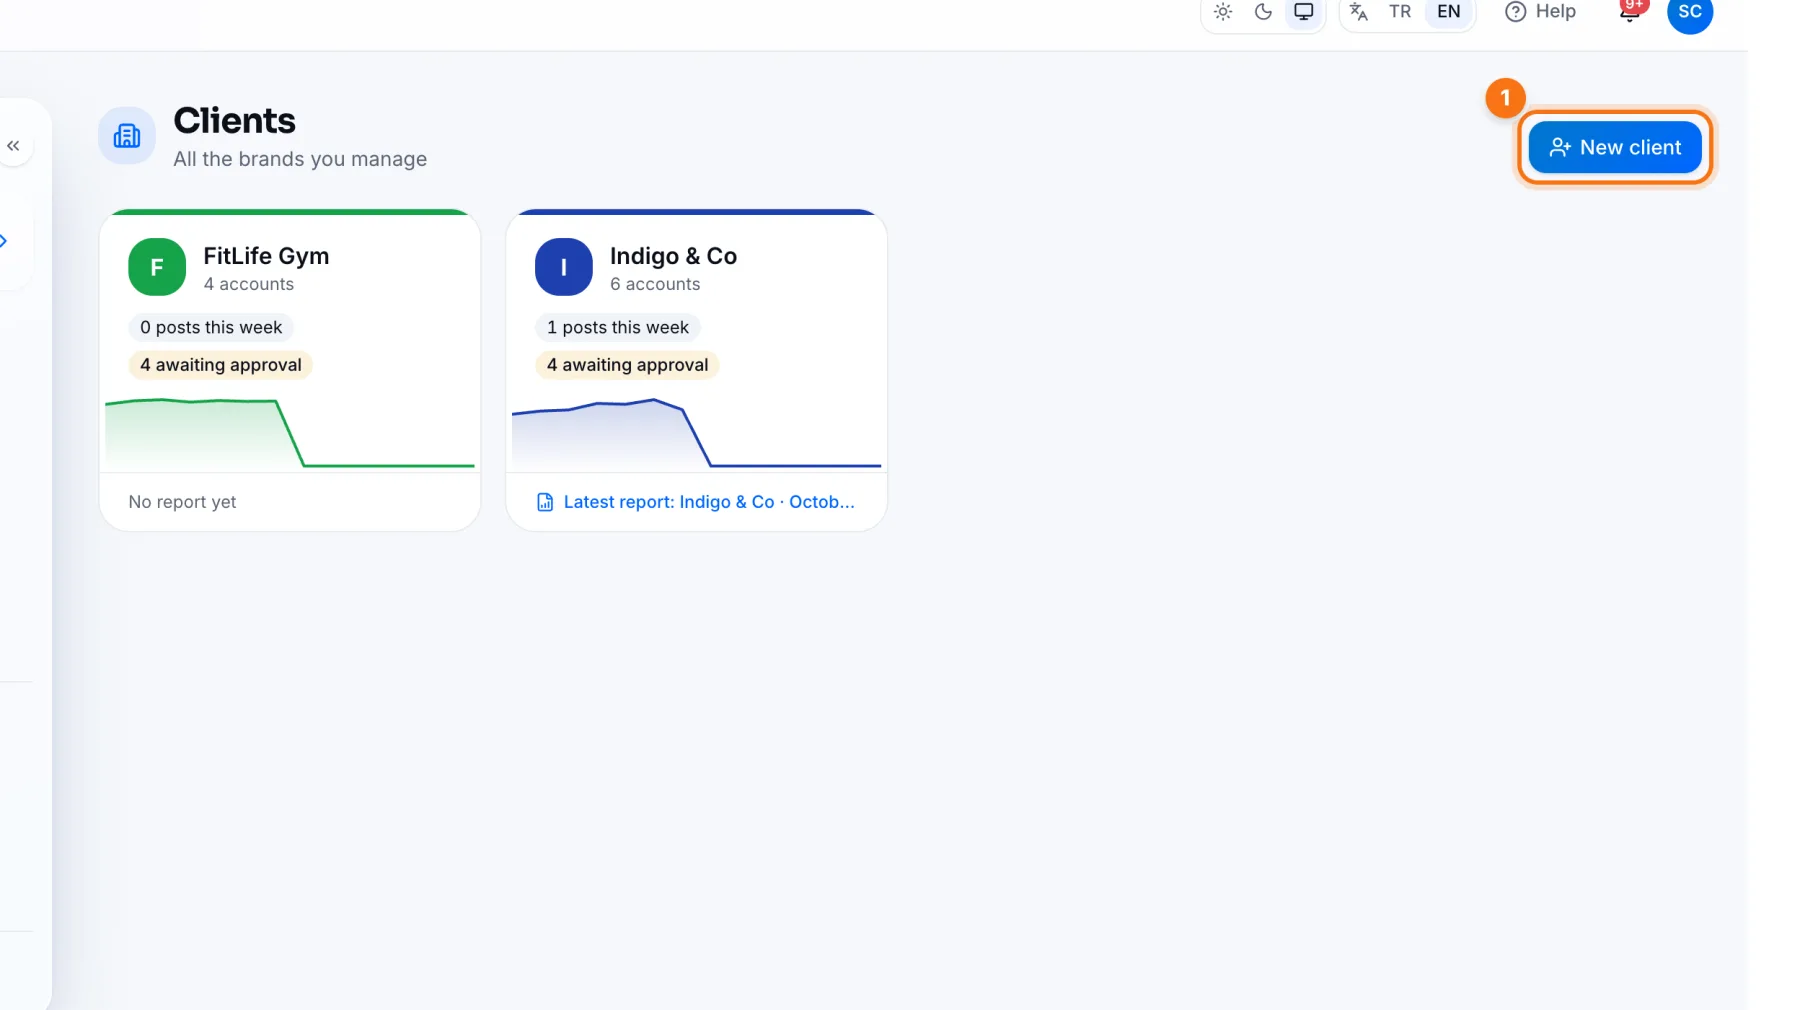 Clients: Adding a New ClientThe client list in the IZY Social agency panel and adding a new client: company details and Brand Memory.Step 2
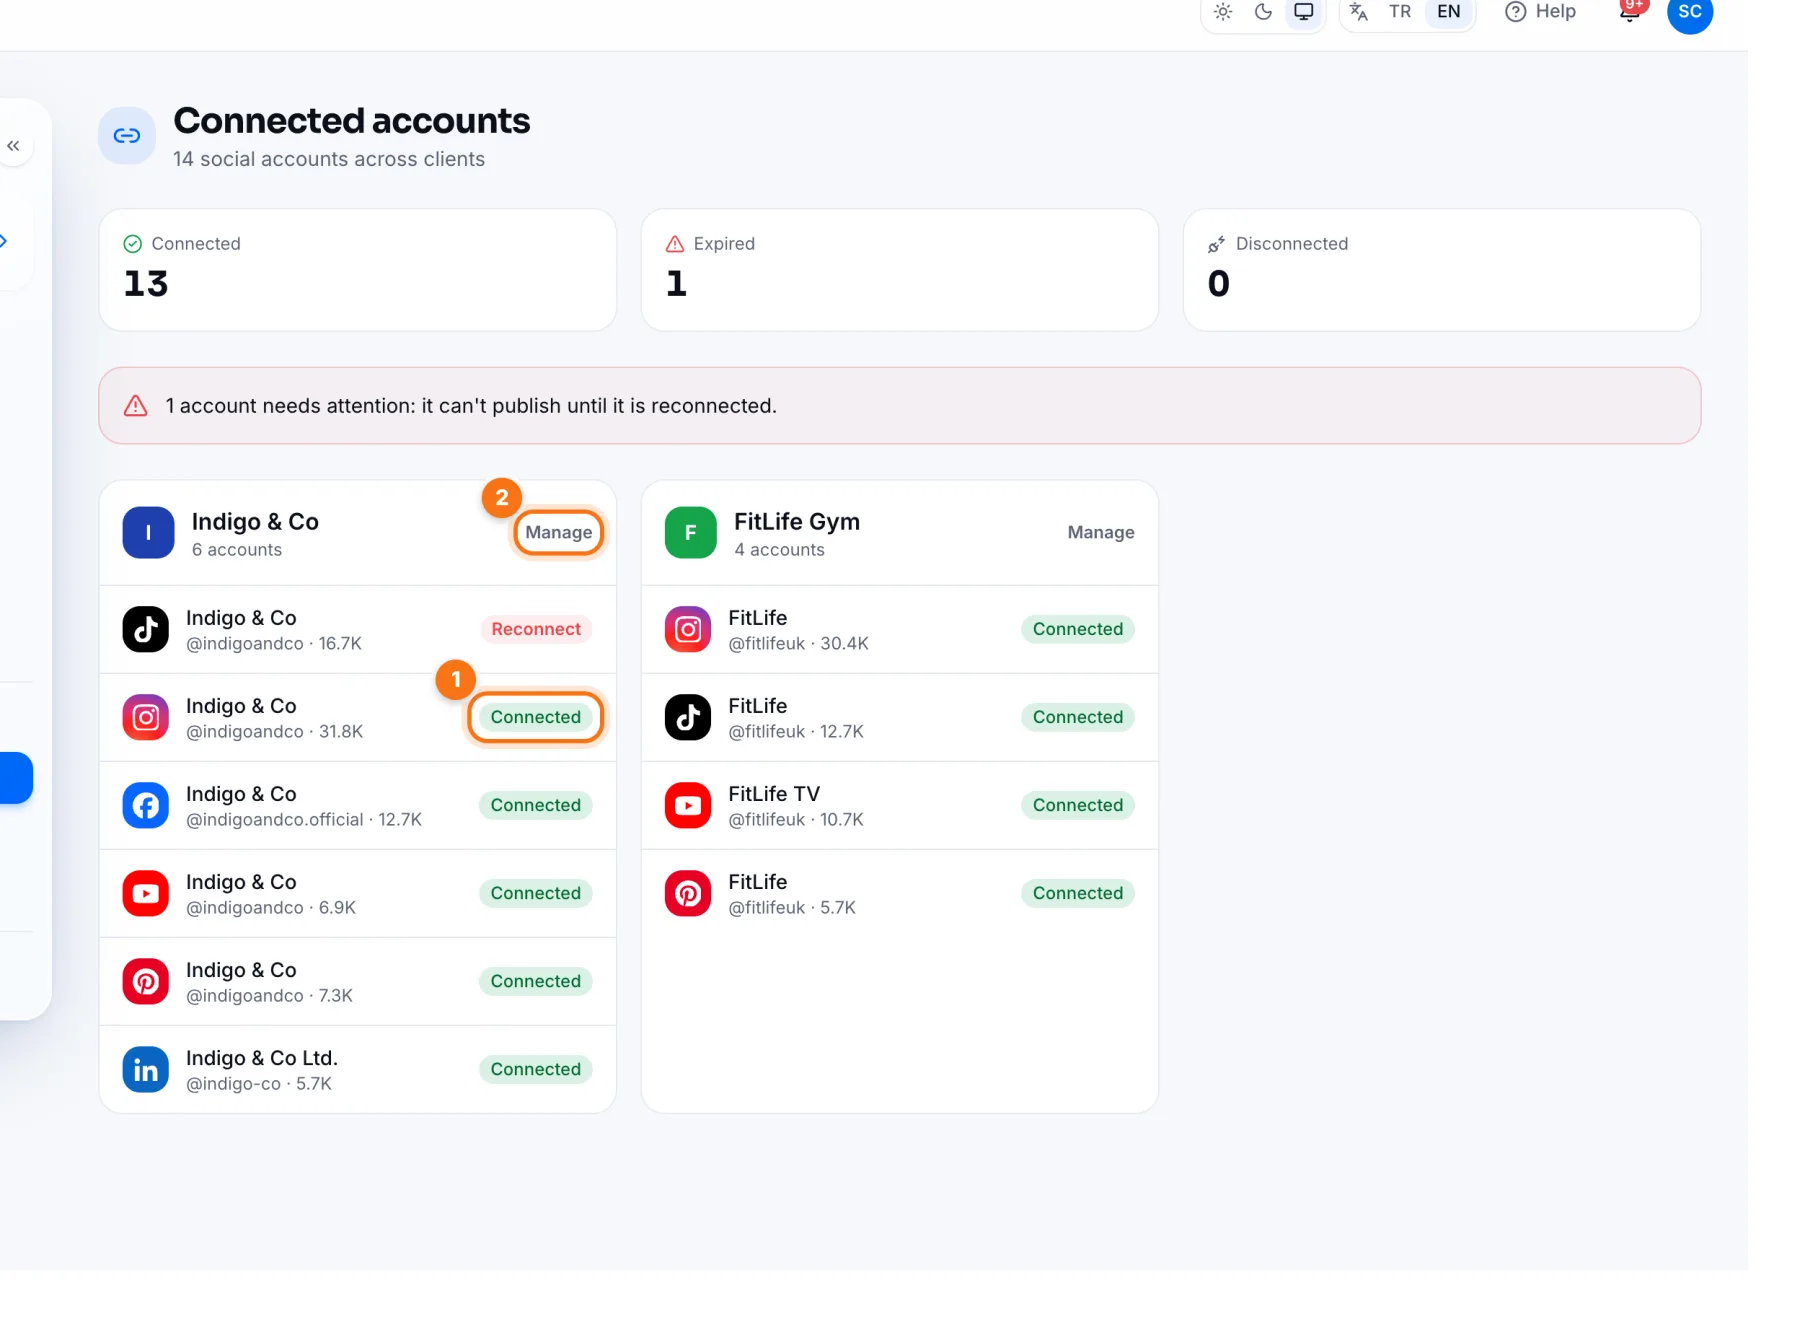 Connected Accounts: Connecting Your Clients' Social AccountsSeeing every client's connected accounts in the IZY Social agency panel, fixing expired ones and connecting new accounts.Step 3
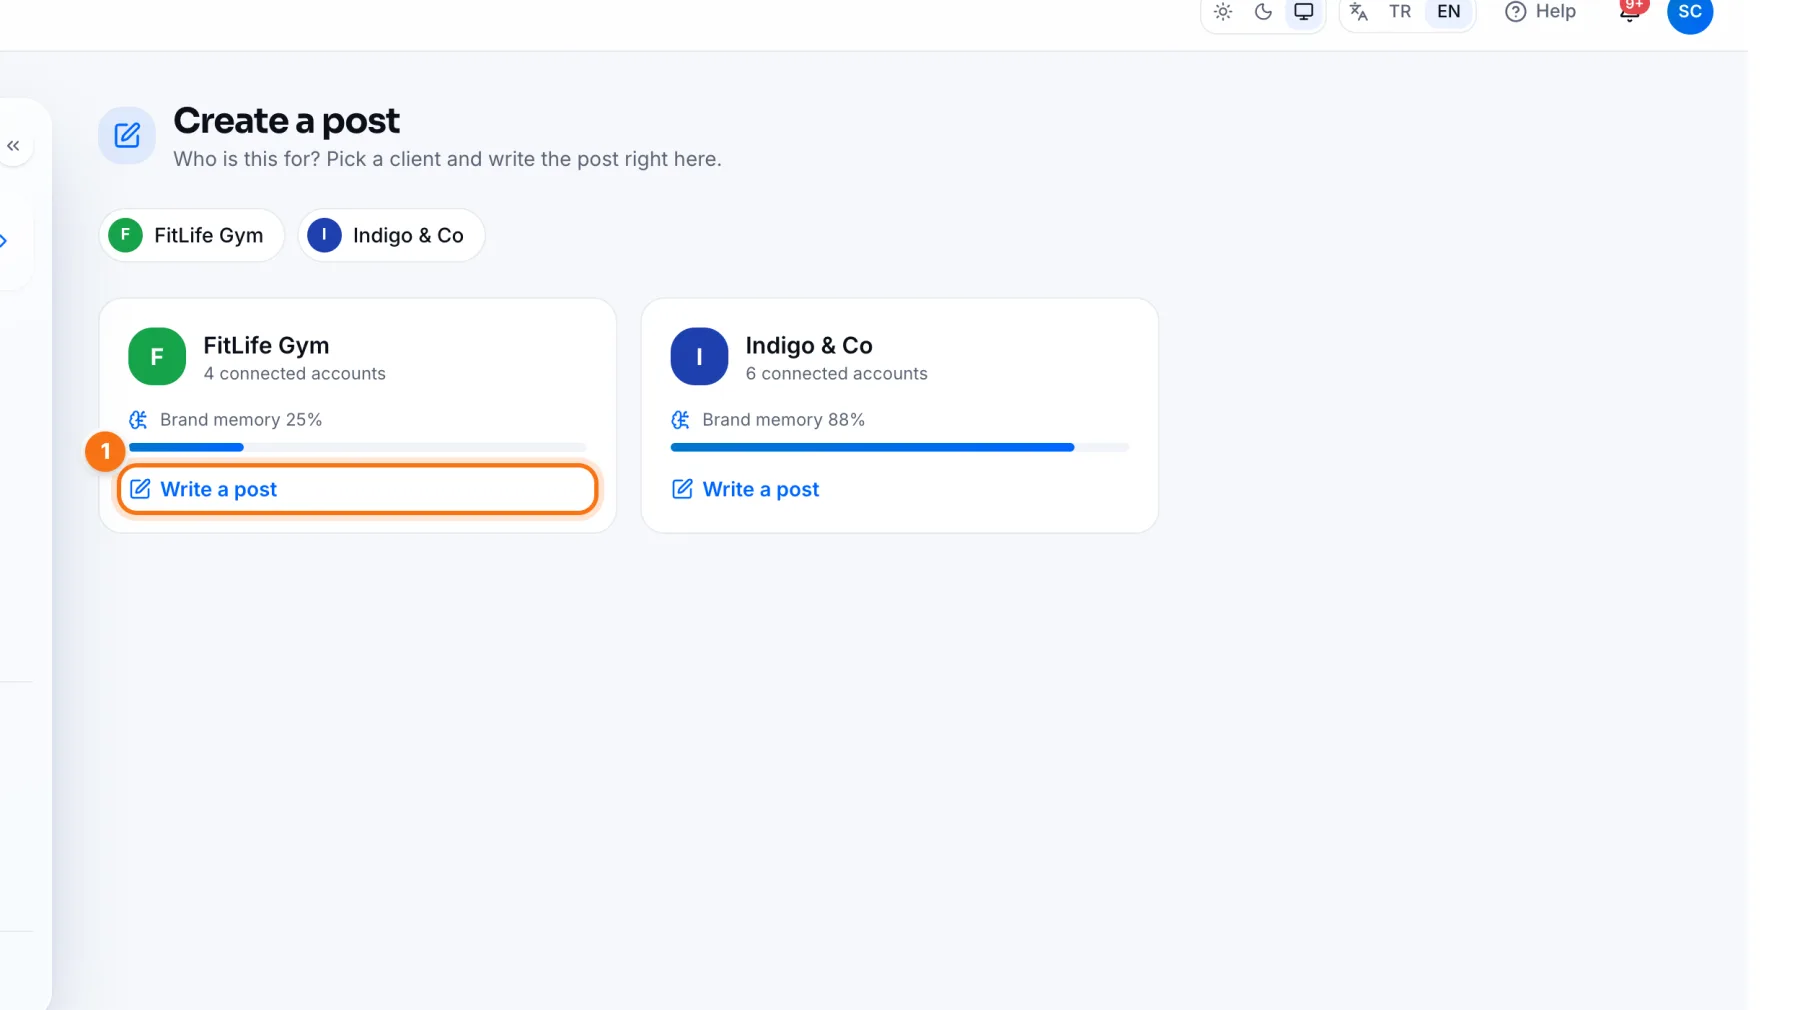 Preparing a Post for a Client and Sending It for ApprovalWriting a post for a client in the IZY Social agency panel; sending it for client approval or adding it to the calendar without approval.Step 4
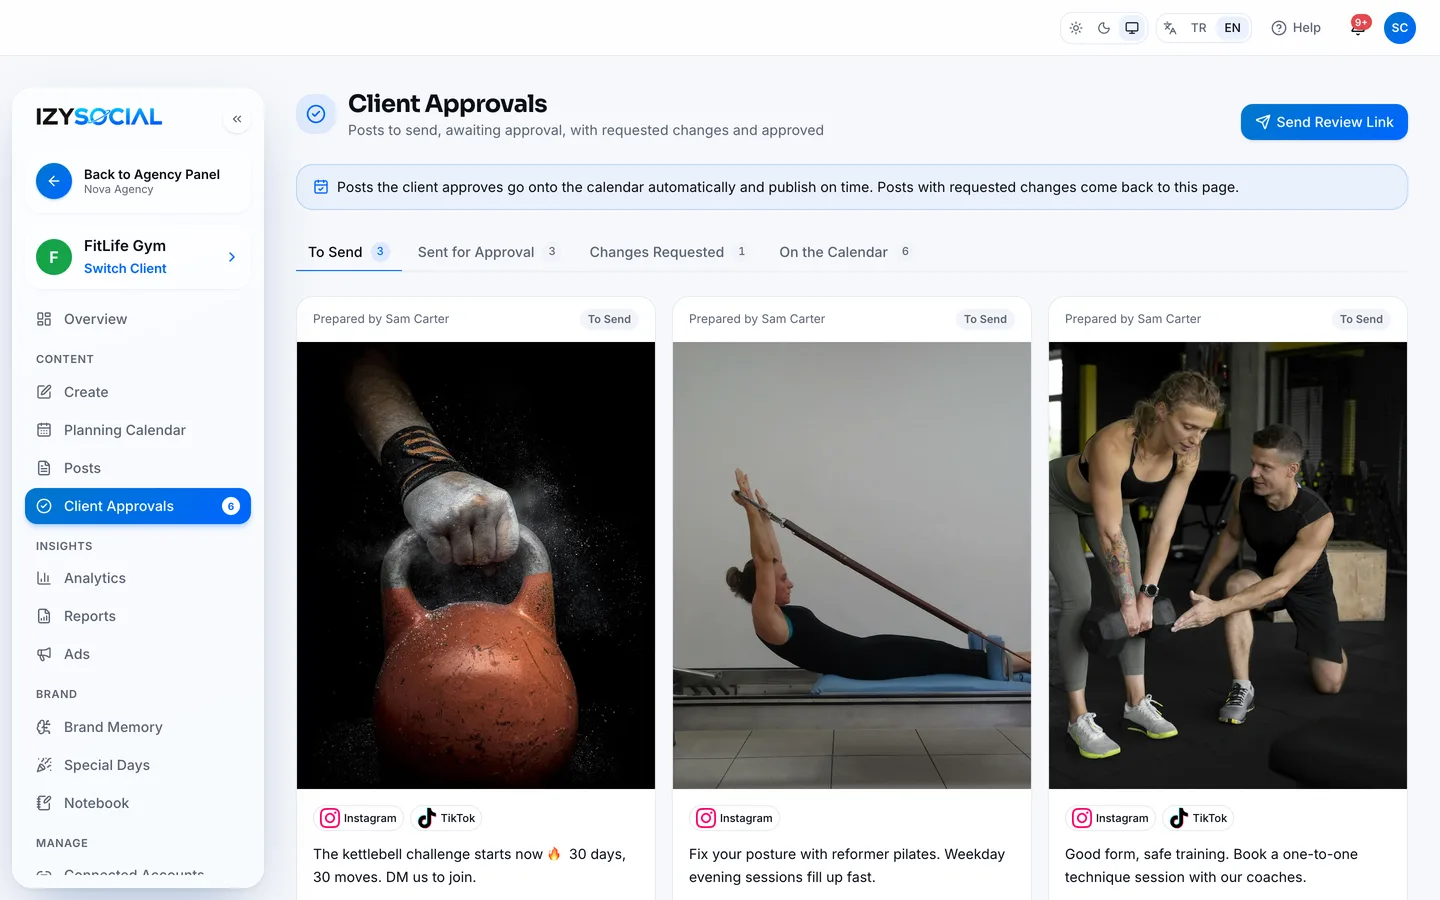 Client Approval: A Password-Free Review Link Instead of WhatsApp ChaosClient approval in IZY Social runs through four tabs: send posts to your client in one link, and they approve or ask for changes without a password.Step 5
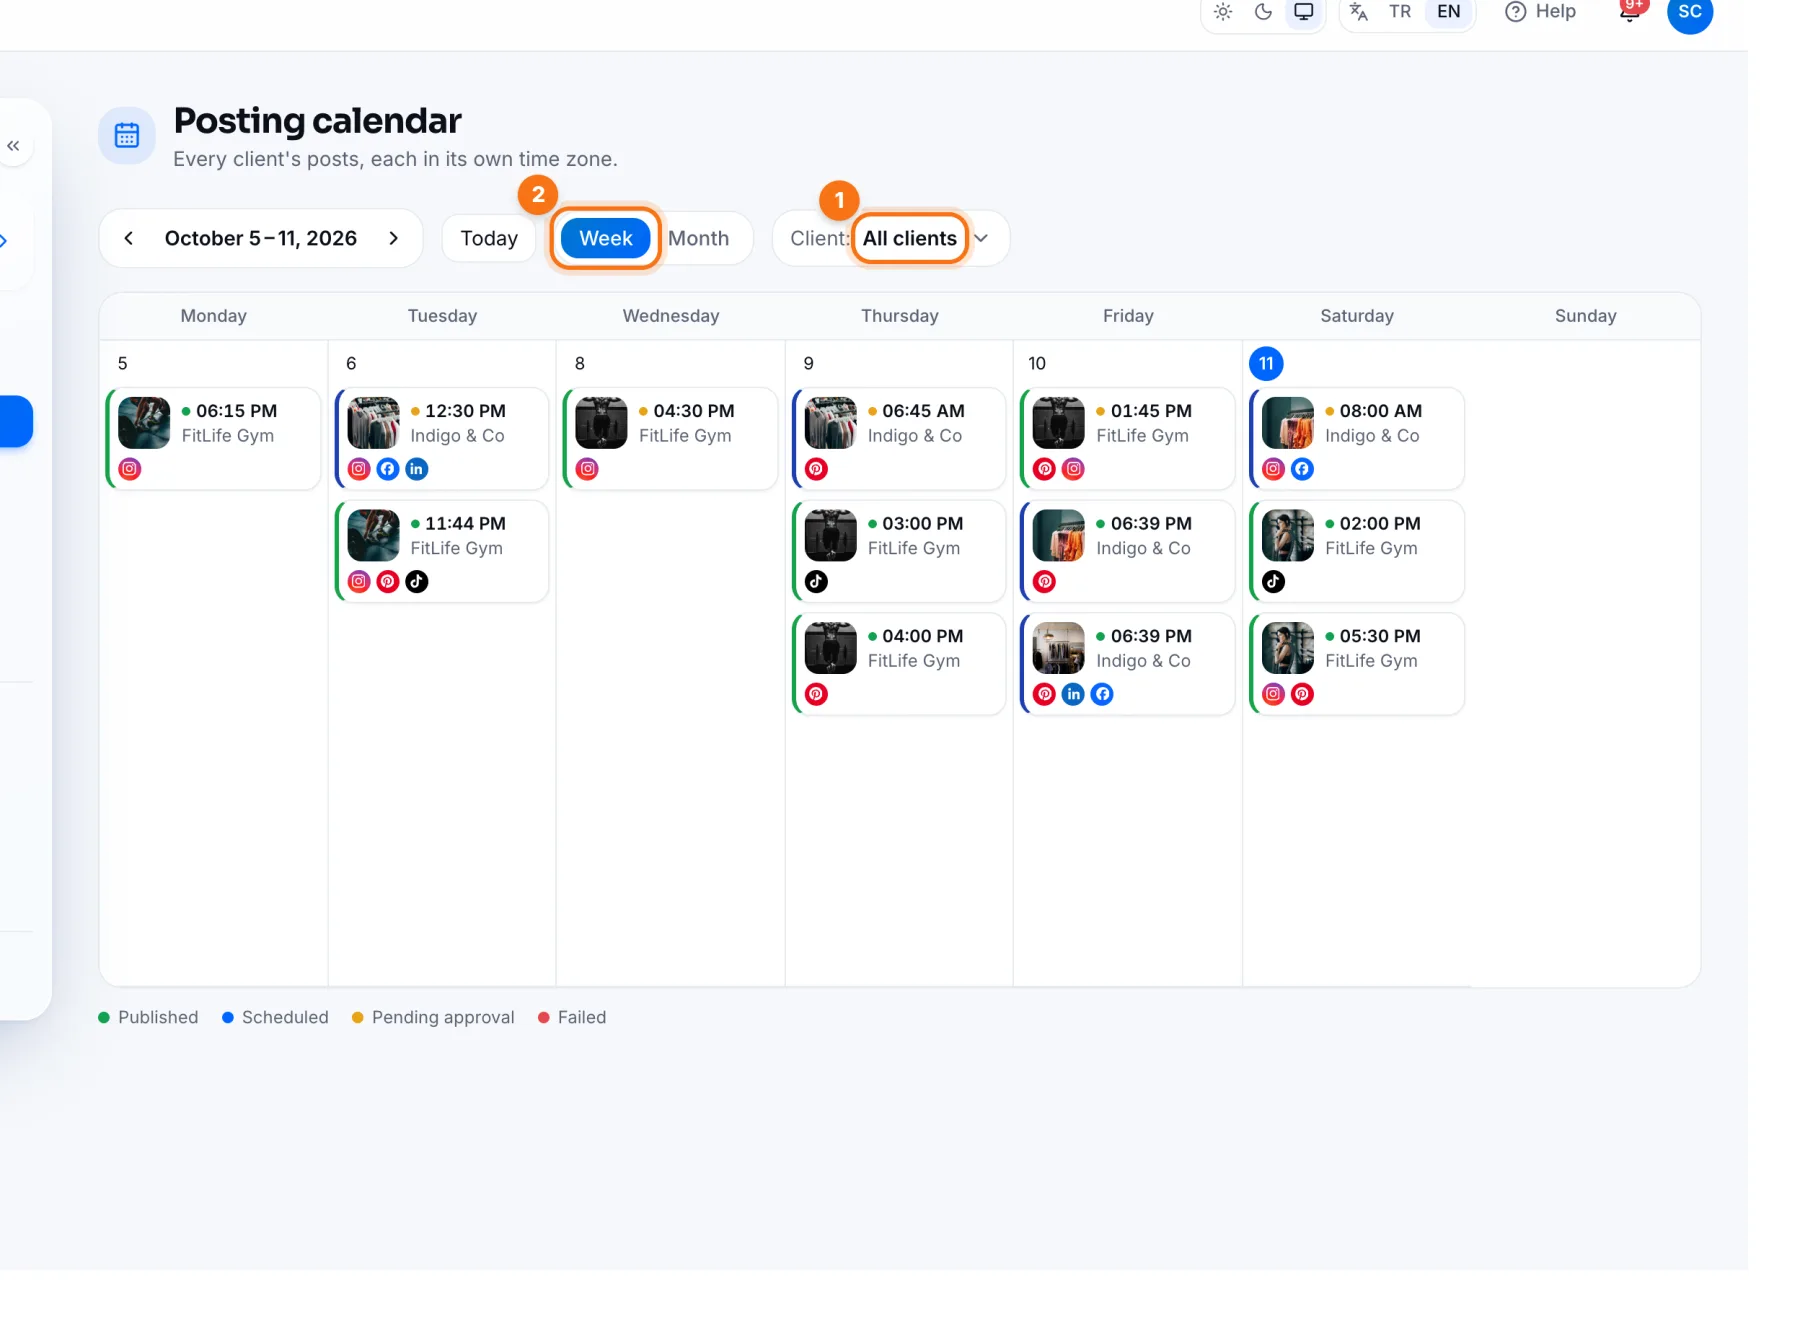 Posting Calendar: Every Client's Posts TogetherSeeing all clients' posts in the IZY Social agency posting calendar in week and month view, and filtering by client.Step 6
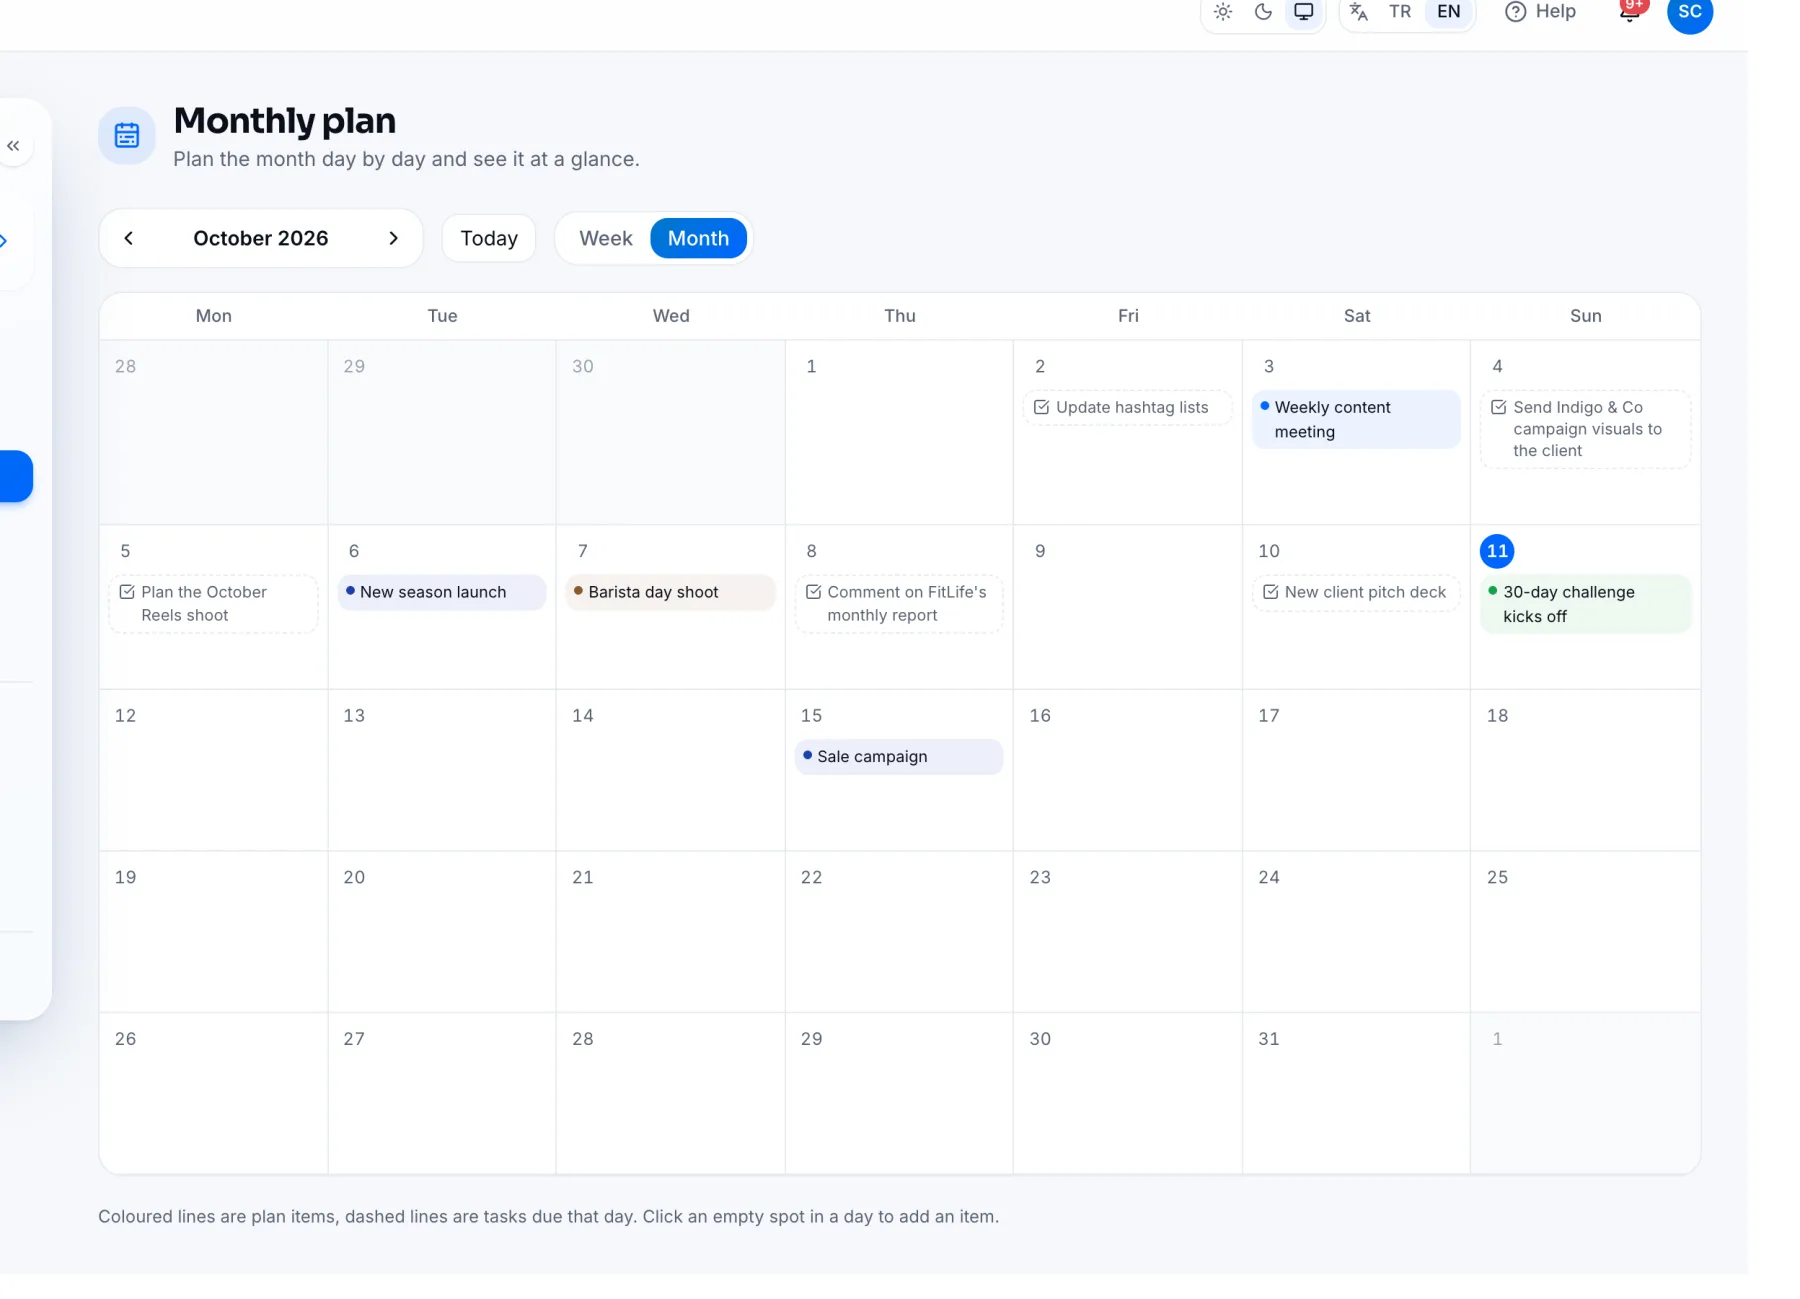 Monthly Work Plan and Tasks: Organise Your Team's WorkWriting the month's plan day by day in the IZY Social agency panel, assigning tasks with clients and deadlines, and completing them.Step 7
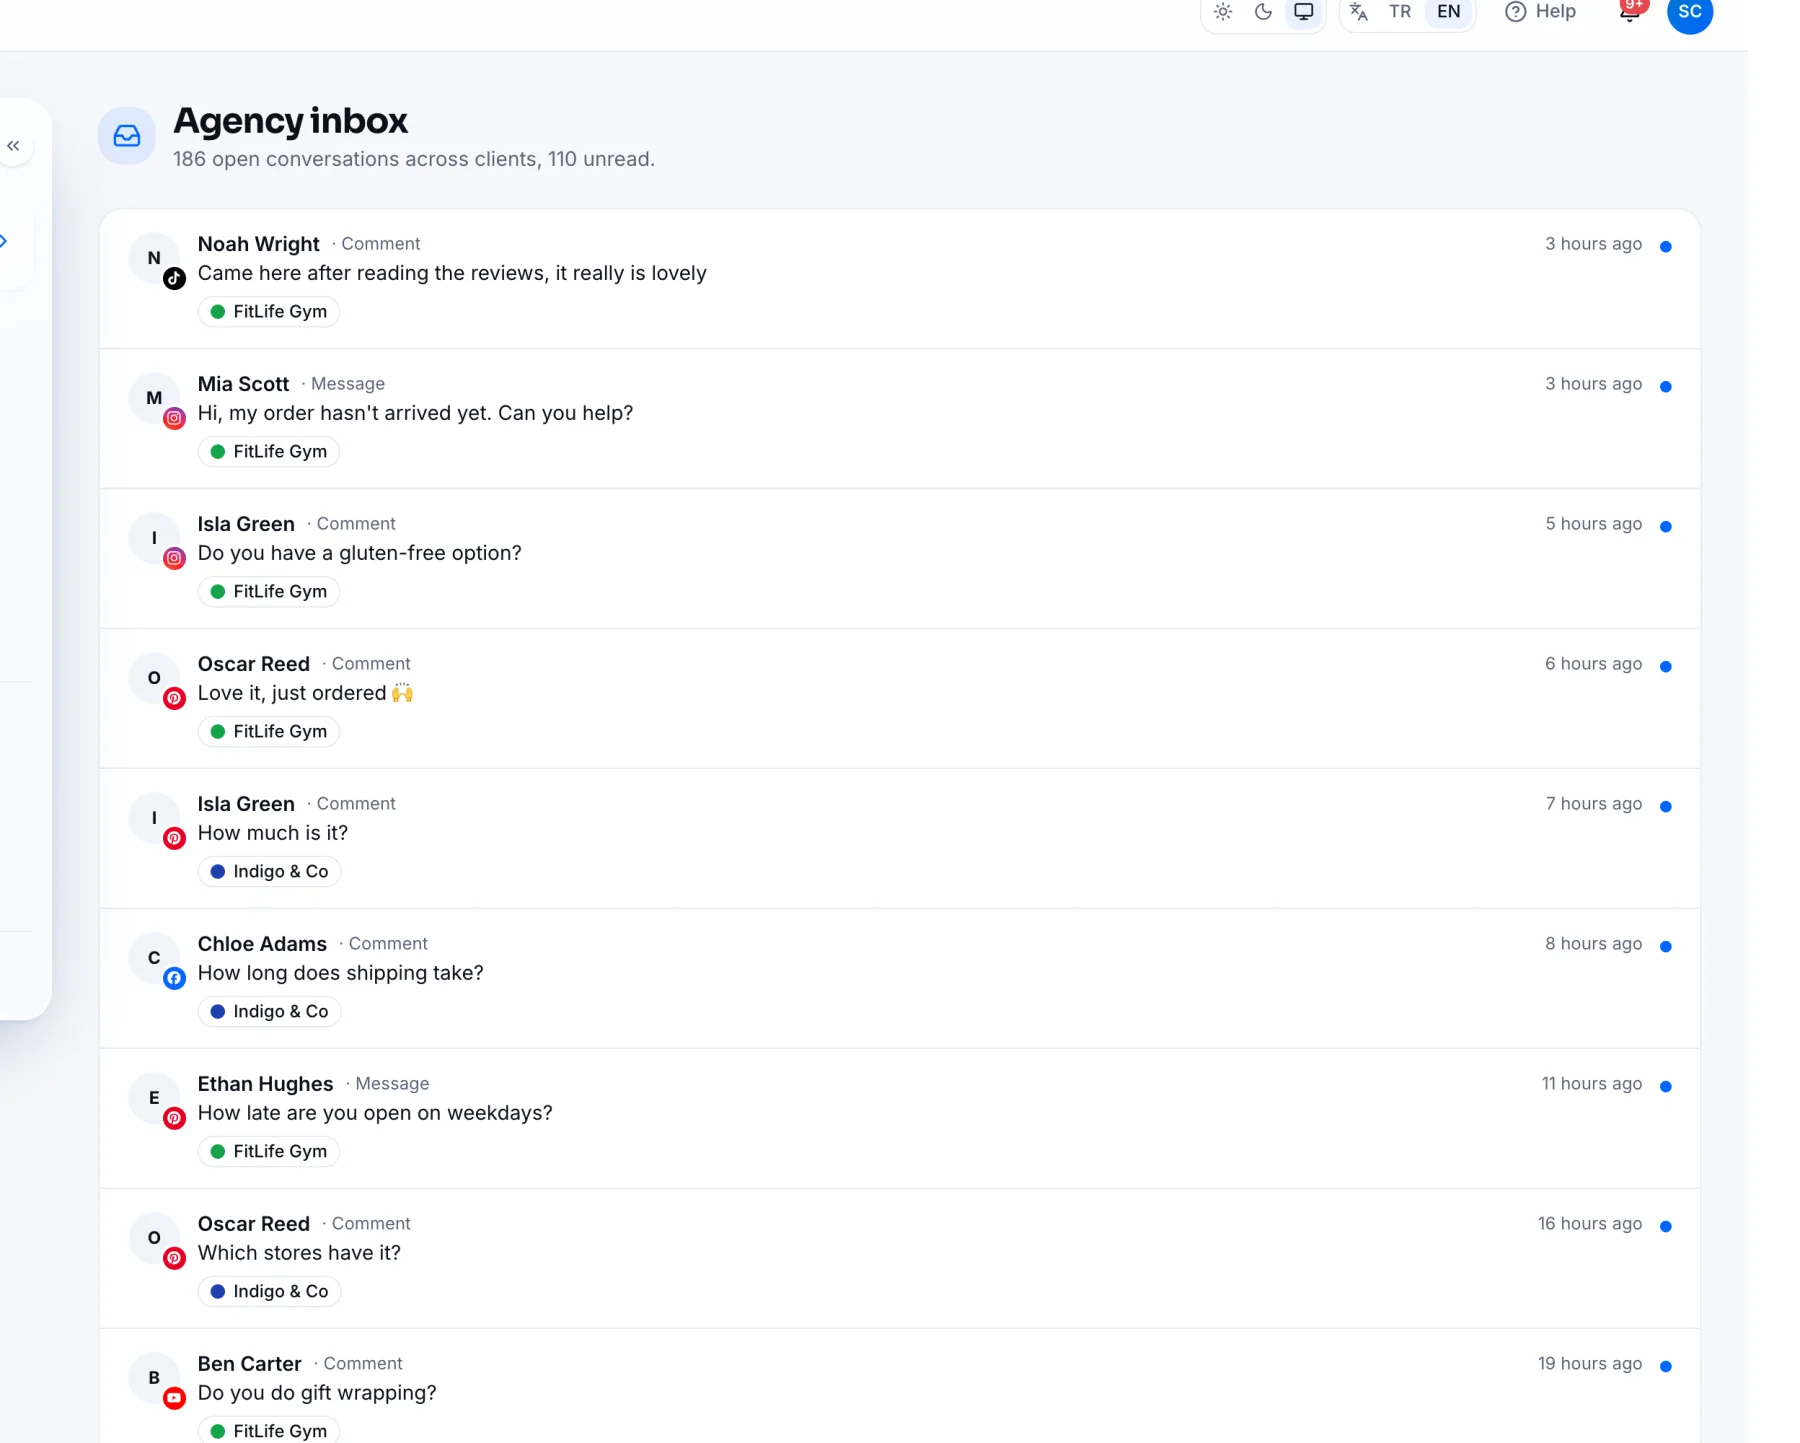 Agency Inbox: Every Client's Messages in One ListSeeing every client's comments and messages in the IZY Social agency inbox, assigning them to teammates and replying.Step 8
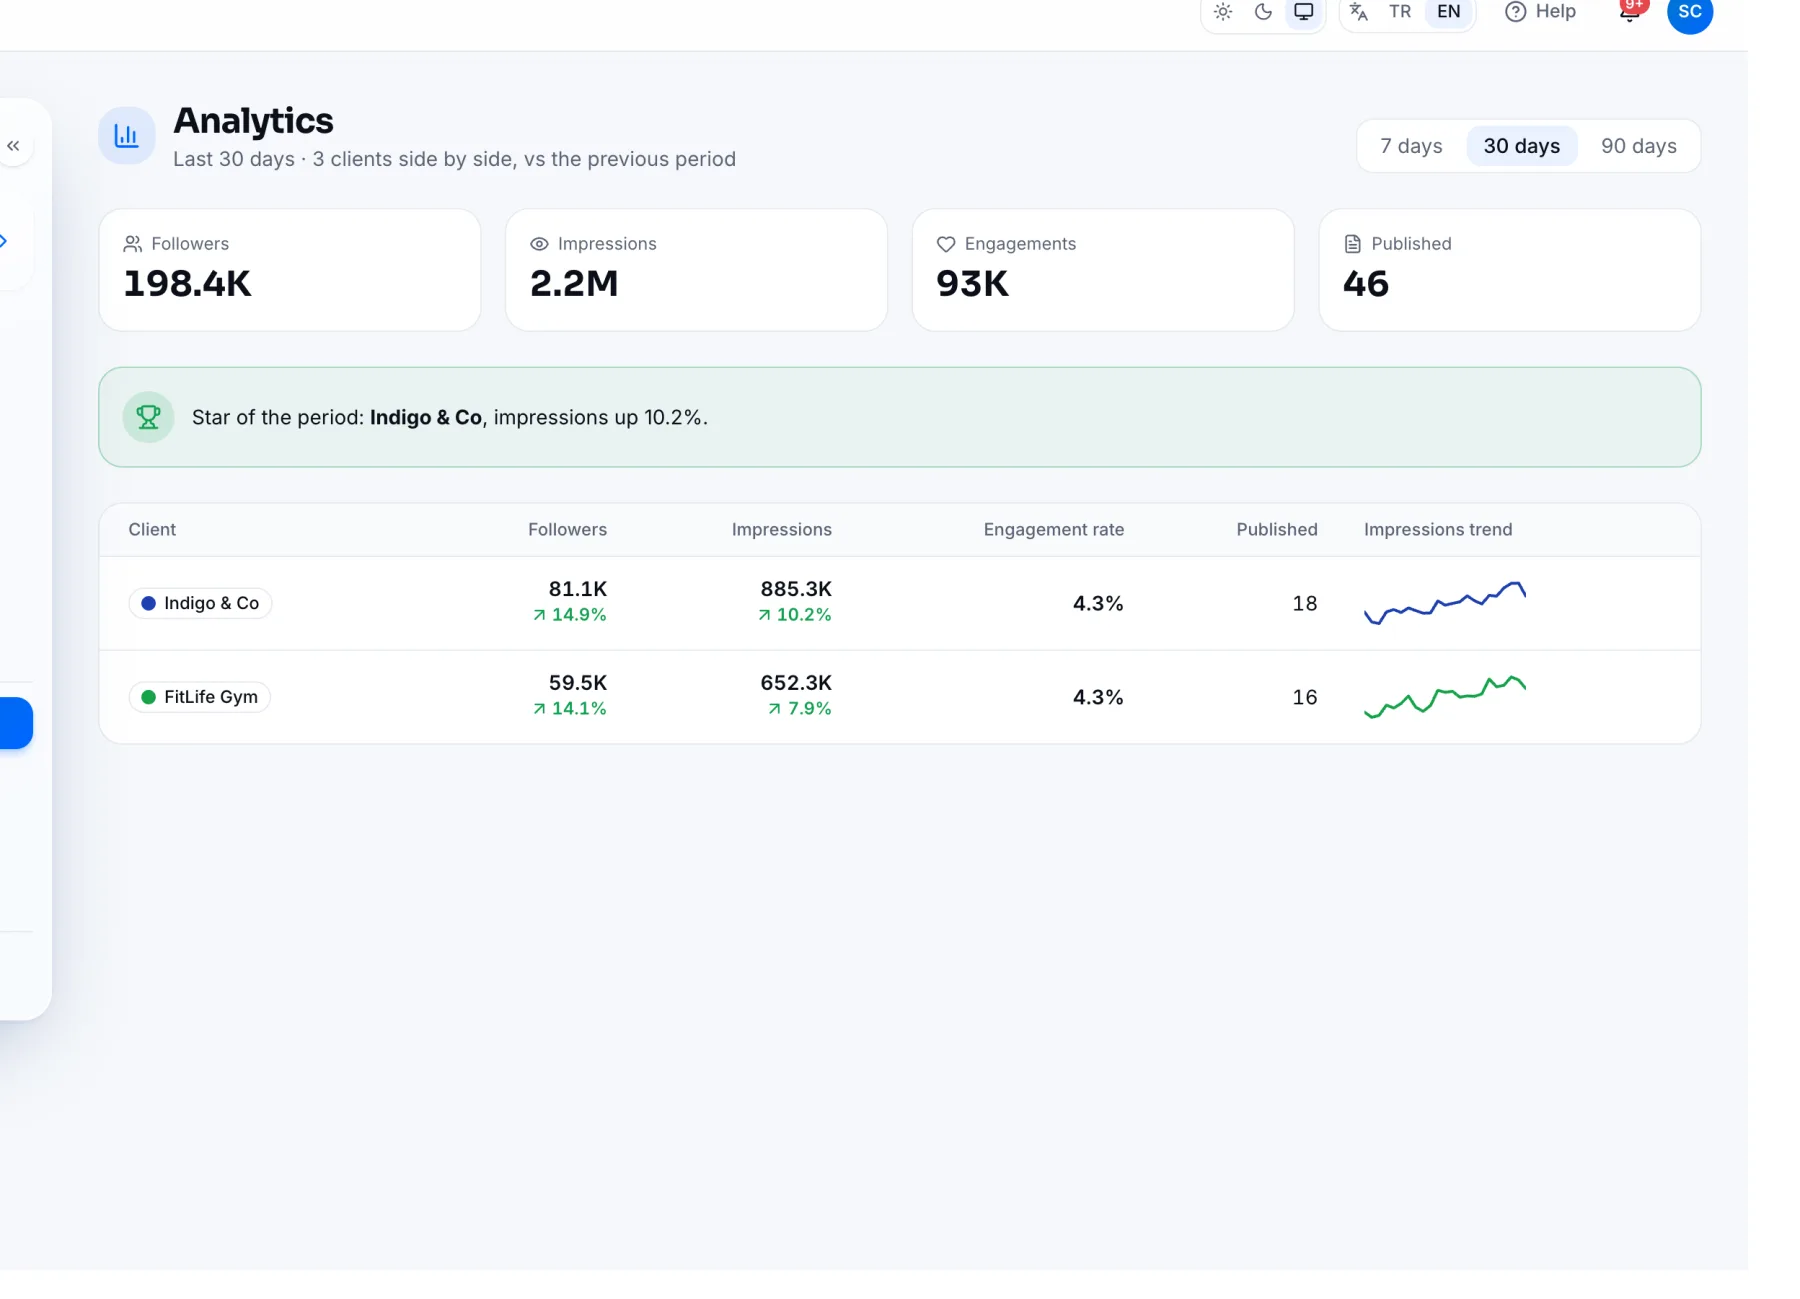 Agency Analytics and Client ReportsComparing every client in IZY Social agency analytics, creating client reports and sending them with a password-free link.Step 9
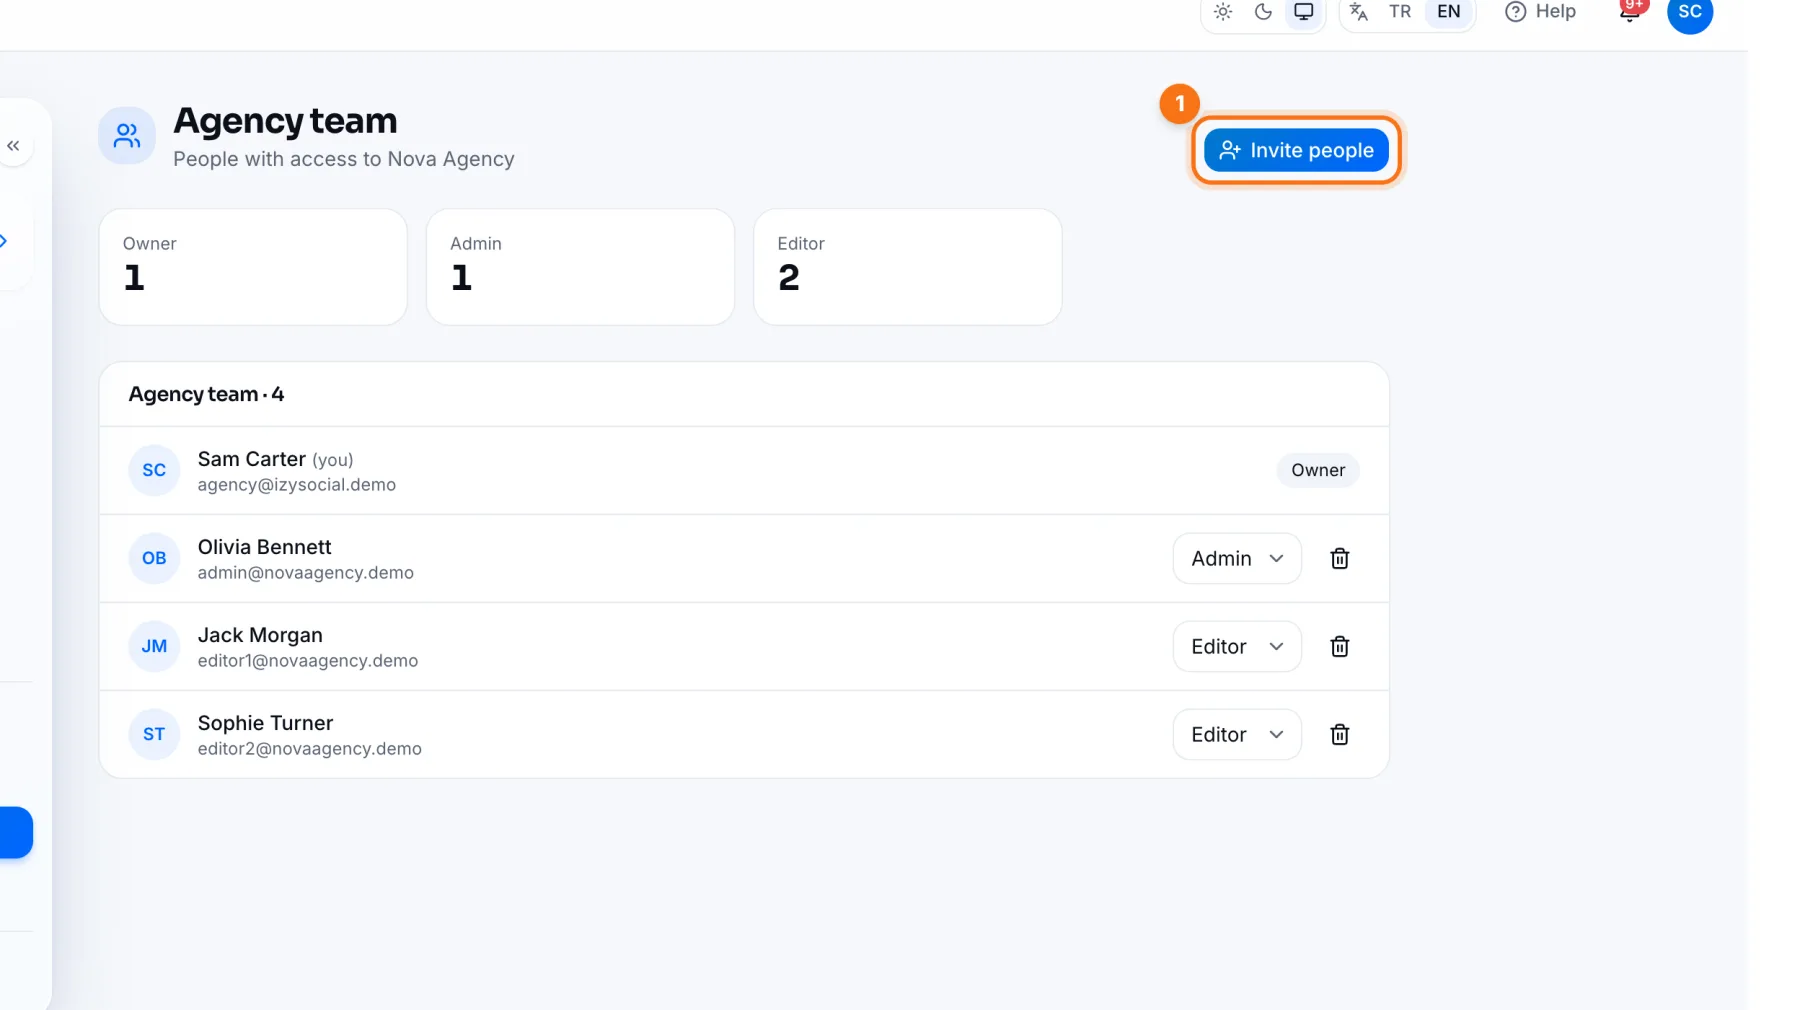 Team, Roles and Agency DetailsInviting teammates to your IZY Social agency, assigning them to clients, understanding the roles (Owner, Admin, Editor) and editing agency details.Step 10